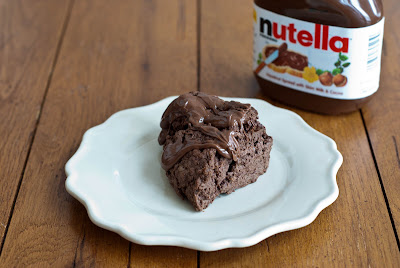
Ahh… Nutella….. my alternative to peanut butter.  Although I do like peanut butter with chocolate, I have never been a huge fan. I do like peanuts, but didn’t grow up on peanut butter and jelly like a lot of kids. In the last few years though I have become a fan of
Nutella! Although I don’t find myself eating it too much, I am a big fan! Josh seems to think it is weird… not sure why… I kind of see it like peanut butter (which he really likes). I just think he likes to give me a hard time! :-)Â I am so excited to be hosting the Club BAKED pic this time around – Nutella Scones and since I am the host I have posted the recipe for these which you will find at the bottom of this post. I have never made scones and so I was a little worried by all the “don’ts” in the recipe – Don’t over-knead, don’t over-bake… In the end I think these came out just right! First step was to mix all the dry ingredients.
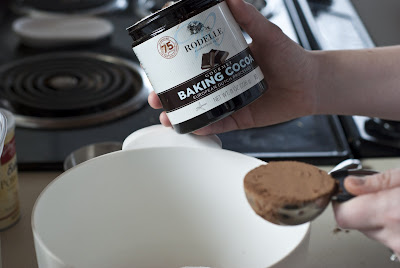
I decided to try a new cocoa powder. They suggest Valrhona, but I haven’t been able to find that around here. I decided to try thisÂ
Rodelle baking cocoa.  I whisked all the dry ingredients (flour, sugar, cocoa powder, baking powder, and salt) together.
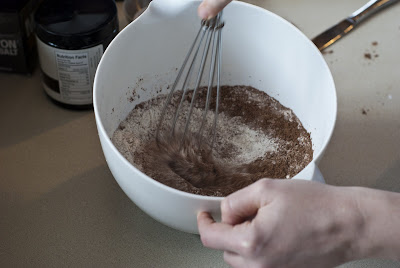
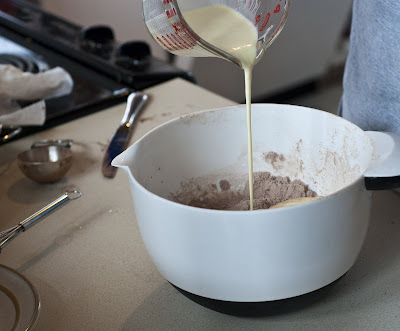
Another thing – I didn’t use unbleached flour. At least, I don’t think so because I just used whatever I had and I am pretty sure it wasn’t unbleached. I am not sure if it made a difference or not. After getting the dry ingredients together I whisked my egg and heavy cream and then added that to the dry mix.
I mixed that until just combined and then it was time to  add the butter. I had already cut the butter into cubes and it was waiting for me in the fridge. Once I got that in there I tried the best I could to use my fingertips to get the butter into the flour forming pea-sized bits. I think it was pretty coarse when I moved onto the next step, but I am wondering if it was a little too grainy still. I had a hard time getting it to stick together, as you can see in the next picture… lots of dough crumbs!  It took a little work, but I finally got it shaped into a 6 by 12 in. and started spreading my Nutella on! Yum!
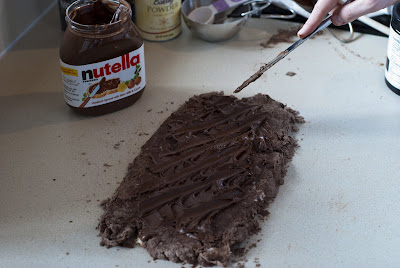
Then it was time to roll. I was worried the whole thing was just going to crumble, but it wasn’t too bad. I did it pretty slow and it actually rolled up pretty easily. As you can see I did leave a little trail of crumbs, but for the most part things came together well.
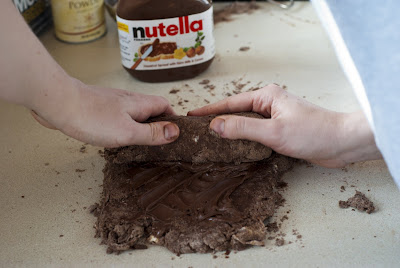
Up the little cylinder went so that it could then be smushed back down into a 1 3/4 in high disk. Here , we were reminded not to overwork the dough! I think I was definitely stressing about making sure to not overwork the dough.
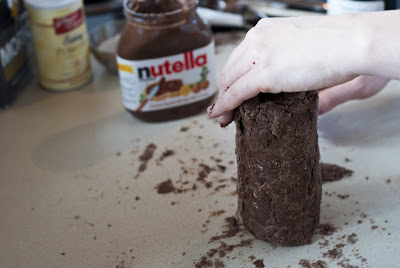
I then decided to use my pizza cutter to cut the wedges. I was only able to get 6. I probably made them a tad bigger than they needed to be though because they are pretty dense. Once I had these cut I put them on my parchment lined cookie sheet.
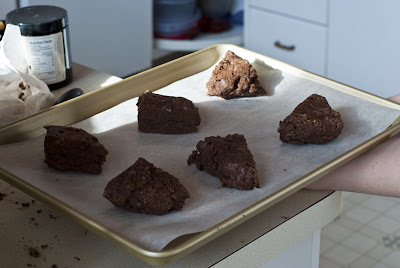
I baked them for 18 minutes – after 9 minutes I rotated the cookie sheet. Once the time was up I checked and thought they could use a few more minutes so I put them back in for two more minutes before taking them out.
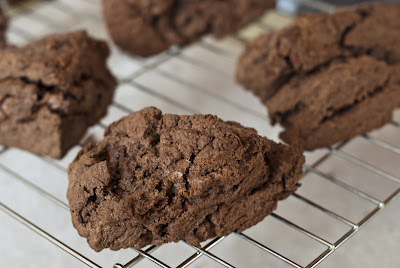
Not too bad, if I do say so myself…I thought they actually looked like scones! Yay! I let them cool completely like the directions said. Once I went back to check out the next part I noticed that it said to put the microwaved Nutella on hot scones. So, I am not sure if I was supposed to let them cool or not. I think it was fine. I poured the Nutella on and let them set in the fridge for about 5 minutes. Here’s the one I decided to eat.
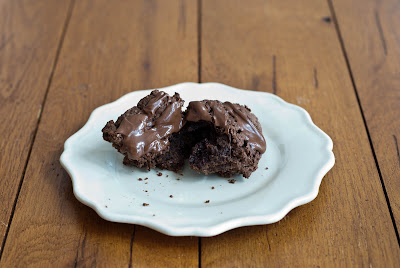
I was actually surprised that it wasn’t too hard. I guess I thought it would be rather crunchy for some reason. I think the only scones I have ever had might have been sitting in the coffee shop for a little bit too long. These were actually a bit soft, but I am not sure they had the flaky texture I have heard scones described as having. I also think I would have liked them to be a bit sweeter. Maybe more Nutella… the Nutella on top definitely helped! That said, these were good in the morning with a cup of tea and in the afternoon with a cup of hot chocolate. I put the ones we didn’t eat into an airtight container and ended up having one in the morning the next day. I actually think I liked them even better on day 2! Thanks everyone for baking along with me! To see all the blog posts go over to
Club: BAKEDÂ and to bake your own follow the recipe below! Next up on the Club: BAKED docket – Mississippi Mud Pie (B) hosted by
Alexis.
Nutella Scones [Printer-Friendly Version]
Yield: 6-8 scones
Ingredients:
2 cups unbleached all-purpose flour
1/4 cup granulated sugar
1/4 cup dark unsweetened cocoa powder (like Valrhona)
1 tablespoon baking powder
1/2 teaspoon salt
6 tablespoons (3/4 stick) cold unsalted butter, cut into chunks
1 large egg
1/2 cup heavy cream
3/4 cup toasted hazelnuts,coarsely chopped
1/2 cup Nutella
*Baked Note*
Matt & Renato’s advice: Do Not Knead Too Much. Stop working the dough the minute it comes together and don’t worry if there are a few dry bits scattered throughout.
Directions:
Preheat the oven to 375 degrees F and place the rack in the center. Line a baking sheet with parchment paper.
In a large bowl, whisk the flour, sugar, cocoa powder, baking powder, and salt until combined.
Add the butter. Use your fingertips to rub it into the flour until the butter is pea size and the mixture is coarse.
In a separate bowl, whisk together the egg and cream. Slowly pour the wet ingredients into the dry ingredients and stir until the dough just comes together. Gently and briefly knead the dough with your hands. Add the toasted hazelnuts and knead gently to incorporate. Flatten the dough into a rectangle approximately 6 by 12 inches. ( it doesn’t need to precise) and spread 1/4 cup of the Nutella on top in a criss cross pattern. Roll the dough up to make a cylinder about 6 inches long, turn it on its end, and gently flatten it into a disk about 1 3/4 inches high. Do not overwork the dough.
Cut the dough into 6 or 8 wedges and place them on the prepared baking sheet. Bake the scones for 18-20 minutes, rotating the baking sheet halfway through, or until a toothpick inserted into the center of a scone comes out clean. Do not overbake.
Transfer the scones to a wire rack to cool completely. Place the baking sheet with the parchment still on it underneath the rack.
Assemble the Nutella Scones:
Heat the remaining 1/4 cup Nutella in a microwave until pourable, about 10 seconds on high. Pierce the tops of the scones a few times with a fork. Use a spoon ( or two spoons-one to scoop, one to scrape) to drip the warm Nutella in a zigzag pattern over the tops of the hot scones. Transfer them to a refrigerator to set for 5 minutes, then serve immediately.
Most scones have a lifespan of 24hours or less; however, these scones taste pretty darn good on day two provided you wrap them tightly and store them at room temperature.
*Baked Note*
Matt & Renato’s advice: Do Not Knead Too Much. Stop working the dough the minute it comes together and don’t worry if there are a few dry bits scattered throughout.





Nice job. I did like how the cylinder made it so easy to cut them all! Thanks for hosting!
Have you ever tried nutella + peanut butter? Yummmmmm!!
Thanks for a great pick! I didnt make a nice cylinder like you — i kinda just mushed it all together.
I wasn’t able to bake along this time, but after seeing your post I definitely have to make these when I get a chance! Looks like you picked a good one to host!!
I love your step-by-step pictures – they will be so helpful for anyone else making these! Nice photos as well!
Thanks so much for picking this recipe! Delicious!
Great pick, everyone loves nutella!!! I did think these needed more nutella, too.
How great you’re moving to Lincoln! I am guessing it’s for a job at UNL! Congratulations! If you have any Nebraska questions, just let me know!!
So glad you could bake along Julie! I Your scones looked great! Definitely more Nutella next time! I will be going to UNL. I start in the fall as an assistant professor of mathematics education.
Thanks Kirsten! Thanks for baking along!
Thanks so much Jamie! My husband is my official photographer… he doesn’t always like taking the step-by-step pictures, but he is nice enough to do it anyway! :-)
sorry you couldn’t bake along this time, but glad that the posts inspired you. The recipe was much easier than I thought it was going to be and I had never made scones before.
Now that sounds tasty Karen! Thanks for baking along!
Thanks Jess! Your scones looked great too! I actually enjoyed rolling up that cylinder! :-)
Thanks for hosting Lorraine. This too was my first time making scones. I had problems with my dough being way too sticky, but other than that they came out great! I love your step by step photos. And your scones turned out beautiful. You really can’t go wrong with Nutella!
Your scones look great and I love your work-in-progress pictures – I always intend on taking some when I bake but my hands end up too messy to handle my camera! lol
Thanks Gloria! These were fun to make and actually pretty easy. Totally agree – Nutella makes everything better! :-)
Thanks Jen! Thanks to my husband I can get those work-in-progress shots without having to clean my hands every two minutes!
Thanks for choosing such a fab recipe!
I baked pies for a local cafe to get me through grad school-emotionally!!. I am so excited to make the nutella scones. They look fantastic.
Thanks Virginia! I started making cupcakes when I was working on my research practicum and just kept going. Let’s see how much I will be able to do as an assistant professor this fall :-)