Archive for Other Sweets
May 26th, 2014

Wow! Where has all the time gone? I can’t believe the last time I posted was over a year ago. I guess when you move and start a new job your cupcaking takes a back seat… Well, at least the blogging about my cupcaking took a back seat. I have continued to bake here and there, but I haven’t been good about taking pictures or posting. I am hoping to change that his summer. Even though I will be teaching two classes and trying to get a ton of writing and prep work done for projects this fall, I hope to get back into blogging… Even if it is just some quick pictures. Thanks to everyone who chimed in on Facebook or Twitter about some good new books to bake and blog with. I couldn’t make up my mind and I bought three: Dorie Greenspan’s Baking: From My Home to Yours , Flo Baker’s The Simple Art of Perfect Baking, and Warren Brown’s United Cakes of America: Recipes Celebrating Every State. I thought since I have lived in quite a few states it might be fun to cook through the places I’ve lived… although, not being a coconut fan could be a problem :-) If anybody has any requests please do send them along!
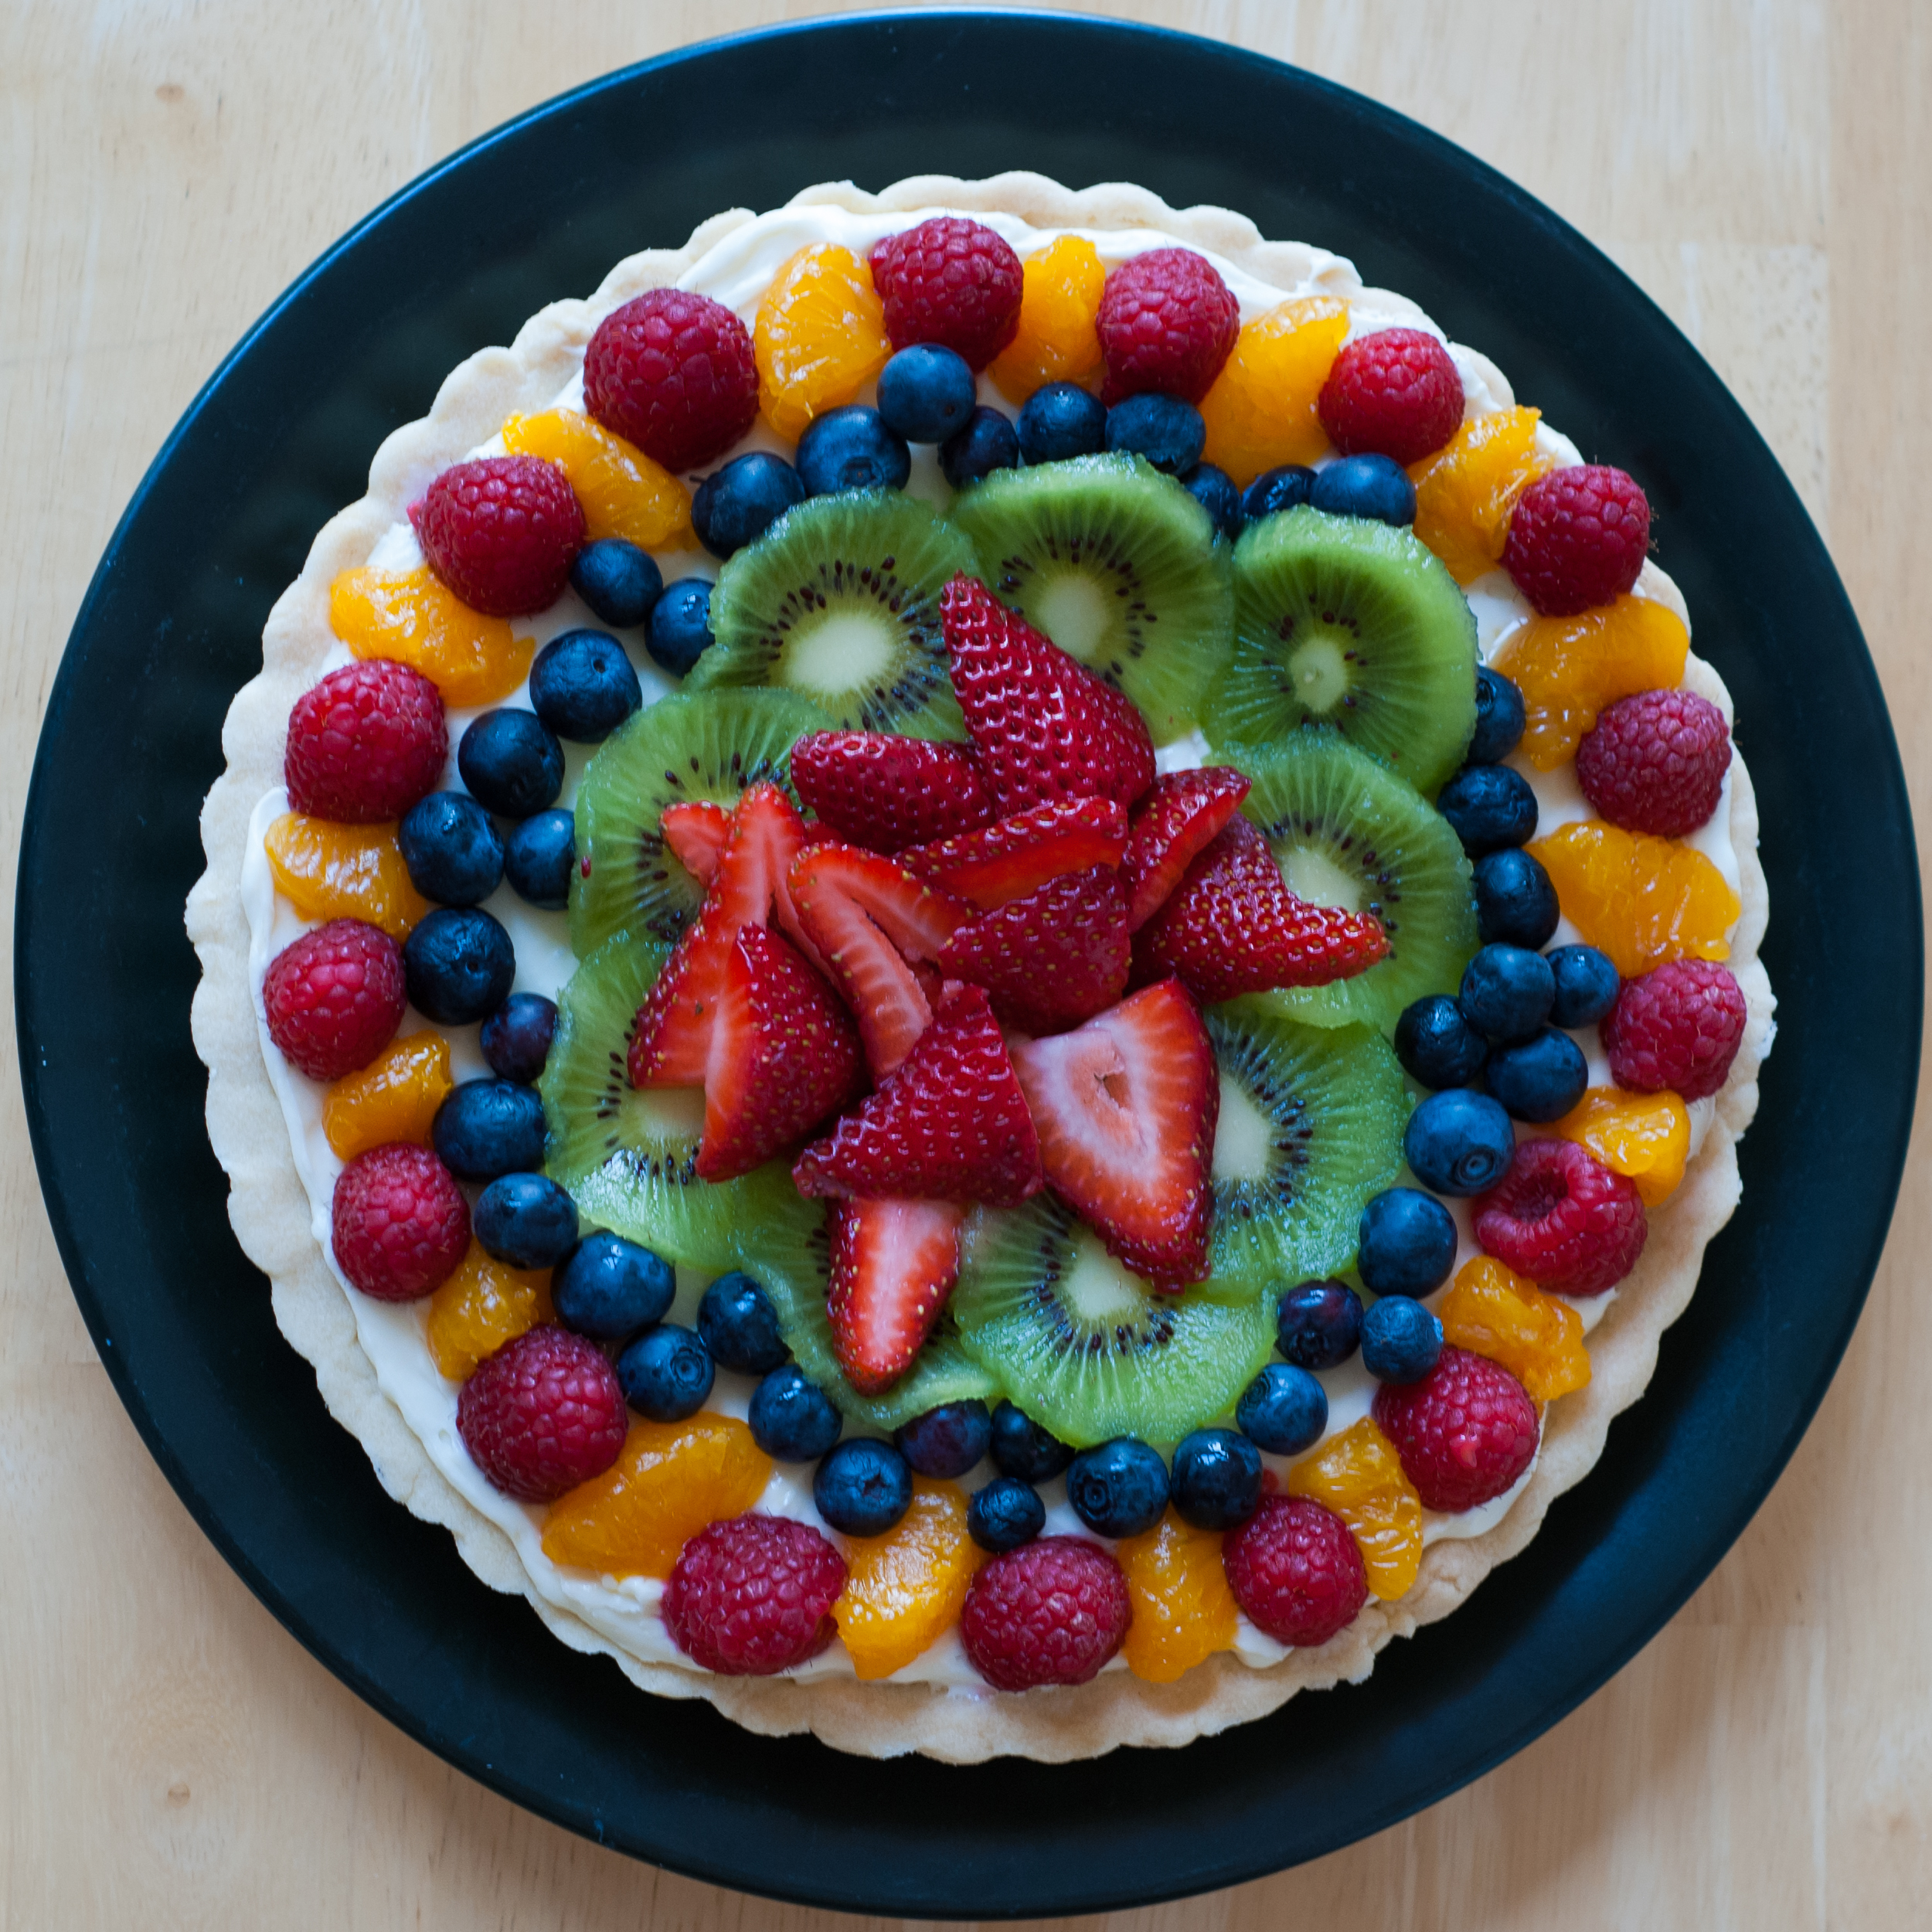
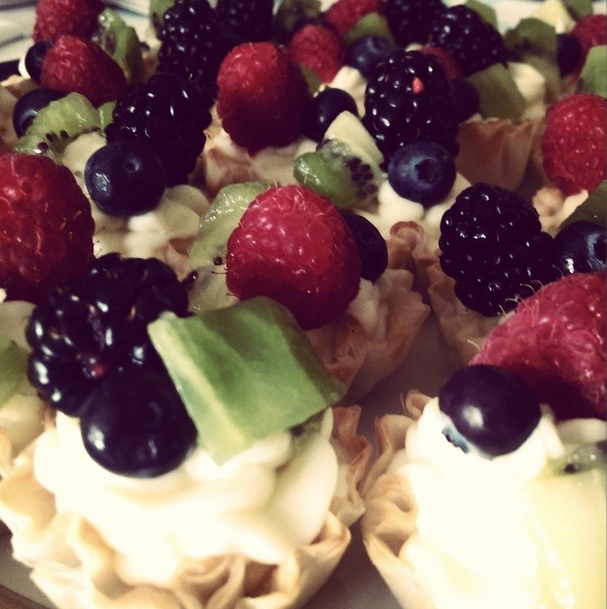
Anyway, over the last few weeks I have baked a few different things for various end of the year or beginning of the summer gatherings, so I figured I’d at least share one of those in this post. I recently converted my very popular White Chocolate Tart into a bite-size version by using little store-bought made fillo dough shells. This went over pretty well. Here are the before and after pics.
Before
After
Hopefully I will be speaking to you all again soon. I’m hoping not to make it another year before I post again!
March 14th, 2013
Where has the time gone? I last posted on this blog when we were still in Michigan. Don’t fear – I haven’t given up cupcaking – just haven’t posted. I could not let Pi Day go without a post though… I mean, people would probably start to worry about me or something. [I’ve also added a link on the right to donate (if you can) to my Great Strides Walk to raise money for research and to support one of my students whose daughter has Cystic Fibrosis – Every dollar counts!]

We are officially settled in Lincoln, NE. We actually have furniture in our living room now and we are settled in at work as well. I am in my second semester at UNL. I just had my annual review meeting yesterday! I’ve been teaching secondary mathematics methods and I absolutely love it! I had a great group last semester who are now student teaching and I have a great new group who helped me celebrate Pi Day this year! They even let me take some pictures of them! :-)
So, I wanted to try something different this time around – not regular sized pies or not cupcakes. So, I made Pi”e” Pops. I found a recipe for doing them completely from scratch, but opted to buy a pie pop machine. It it was only $12 and was well worth it! I made the ones we are holding first – apple pie pops and piped the digits using candy melts. It took quite a while to pipe all those digits, so when I made the second batch using bits of toffee and a pinch of salt (which I don’t have pictures of) I opted to just use an edible marker for the digits. To be honest, the candy melts looked way better, despite the time it took.

PiDay2013-6
10-Mar-2013 19:40, NIKON CORPORATION NIKON D80, 8.0, 100.0mm, 0.006 sec, ISO 100
I figured these weren’t going to be that easy to transport as is so I decided to wrap them up a bit and attach a little gift tag.

PiDay2013-10
10-Mar-2013 21:39, NIKON CORPORATION NIKON D80, 8.0, 100.0mm, 0.01 sec, ISO 100
First we took the group picture. After that we of course listened to Lose Yourself in the Digits. If you haven’t heard this, you need to check it out!

PiDay2013-5
12-Mar-2013 15:06, SONY NEX-7, 6.3, 30.0mm, 0.017 sec, ISO 400

PiDay2013-4
12-Mar-2013 15:06, SONY NEX-7, 6.3, 30.0mm, 0.017 sec, ISO 400

PiDay2013-3
12-Mar-2013 15:05, SONY NEX-7, 6.3, 30.0mm, 0.017 sec, ISO 400

PiDay2013-2
12-Mar-2013 15:03, SONY NEX-7, 6.3, 30.0mm, 0.017 sec, ISO 160
Then it was time to find Pi! We engaged in a sequence of activities I combined from
The Interactive Mathematics Program, called Discovering Pi. Each group had different polygons – square, hexagon, octagon, etc… and were asked to circumscribe a circle and use the polygon to estimate the circumference and area of the circle. We then used a spreadsheet to look at what would happen as we increased the number of sides of our polygon.
Oh yeah, and then we ate our pi pops!

PiDay2013-6
12-Mar-2013 15:26, SONY NEX-7, 6.3, 30.0mm, 0.017 sec, ISO 400
Thanks to all of my students for letting me post these pics and for indulging in our Pi Day shenanigans!
Wishing everyone a VERY Happy Pi Day!
February 29th, 2012

Ahh… Nutella….. my alternative to peanut butter.  Although I do like peanut butter with chocolate, I have never been a huge fan. I do like peanuts, but didn’t grow up on peanut butter and jelly like a lot of kids. In the last few years though I have become a fan of
Nutella! Although I don’t find myself eating it too much, I am a big fan! Josh seems to think it is weird… not sure why… I kind of see it like peanut butter (which he really likes). I just think he likes to give me a hard time! :-)Â I am so excited to be hosting the Club BAKED pic this time around – Nutella Scones and since I am the host I have posted the recipe for these which you will find at the bottom of this post. I have never made scones and so I was a little worried by all the “don’ts” in the recipe – Don’t over-knead, don’t over-bake… In the end I think these came out just right! First step was to mix all the dry ingredients.

I decided to try a new cocoa powder. They suggest Valrhona, but I haven’t been able to find that around here. I decided to try thisÂ
Rodelle baking cocoa.  I whisked all the dry ingredients (flour, sugar, cocoa powder, baking powder, and salt) together.

Another thing – I didn’t use unbleached flour. At least, I don’t think so because I just used whatever I had and I am pretty sure it wasn’t unbleached. I am not sure if it made a difference or not. After getting the dry ingredients together I whisked my egg and heavy cream and then added that to the dry mix.

I mixed that until just combined and then it was time to  add the butter. I had already cut the butter into cubes and it was waiting for me in the fridge. Once I got that in there I tried the best I could to use my fingertips to get the butter into the flour forming pea-sized bits. I think it was pretty coarse when I moved onto the next step, but I am wondering if it was a little too grainy still. I had a hard time getting it to stick together, as you can see in the next picture… lots of dough crumbs!  It took a little work, but I finally got it shaped into a 6 by 12 in. and started spreading my Nutella on! Yum!

Then it was time to roll. I was worried the whole thing was just going to crumble, but it wasn’t too bad. I did it pretty slow and it actually rolled up pretty easily. As you can see I did leave a little trail of crumbs, but for the most part things came together well.

Up the little cylinder went so that it could then be smushed back down into a 1 3/4 in high disk. Here , we were reminded not to overwork the dough! I think I was definitely stressing about making sure to not overwork the dough.

I then decided to use my pizza cutter to cut the wedges. I was only able to get 6. I probably made them a tad bigger than they needed to be though because they are pretty dense. Once I had these cut I put them on my parchment lined cookie sheet.

I baked them for 18 minutes – after 9 minutes I rotated the cookie sheet. Once the time was up I checked and thought they could use a few more minutes so I put them back in for two more minutes before taking them out.

Not too bad, if I do say so myself…I thought they actually looked like scones! Yay! I let them cool completely like the directions said. Once I went back to check out the next part I noticed that it said to put the microwaved Nutella on hot scones. So, I am not sure if I was supposed to let them cool or not. I think it was fine. I poured the Nutella on and let them set in the fridge for about 5 minutes. Here’s the one I decided to eat.

I was actually surprised that it wasn’t too hard. I guess I thought it would be rather crunchy for some reason. I think the only scones I have ever had might have been sitting in the coffee shop for a little bit too long. These were actually a bit soft, but I am not sure they had the flaky texture I have heard scones described as having. I also think I would have liked them to be a bit sweeter. Maybe more Nutella… the Nutella on top definitely helped! That said, these were good in the morning with a cup of tea and in the afternoon with a cup of hot chocolate. I put the ones we didn’t eat into an airtight container and ended up having one in the morning the next day. I actually think I liked them even better on day 2! Thanks everyone for baking along with me! To see all the blog posts go over to
Club: BAKEDÂ and to bake your own follow the recipe below! Next up on the Club: BAKED docket – Mississippi Mud Pie (B) hosted by
Alexis.
Nutella Scones [Printer-Friendly Version]
Yield: 6-8 scones
Ingredients:
2 cups unbleached all-purpose flour
1/4 cup granulated sugar
1/4 cup dark unsweetened cocoa powder (like Valrhona)
1 tablespoon baking powder
1/2 teaspoon salt
6 tablespoons (3/4 stick) cold unsalted butter, cut into chunks
1 large egg
1/2 cup heavy cream
3/4 cup toasted hazelnuts,coarsely chopped
1/2 cup Nutella
*Baked Note*
Matt & Renato’s advice: Do Not Knead Too Much. Stop working the dough the minute it comes together and don’t worry if there are a few dry bits scattered throughout.
Directions:
Preheat the oven to 375 degrees F and place the rack in the center. Line a baking sheet with parchment paper.
In a large bowl, whisk the flour, sugar, cocoa powder, baking powder, and salt until combined.
Add the butter. Use your fingertips to rub it into the flour until the butter is pea size and the mixture is coarse.
In a separate bowl, whisk together the egg and cream. Slowly pour the wet ingredients into the dry ingredients and stir until the dough just comes together. Gently and briefly knead the dough with your hands. Add the toasted hazelnuts and knead gently to incorporate. Flatten the dough into a rectangle approximately 6 by 12 inches. ( it doesn’t need to precise) and spread 1/4 cup of the Nutella on top in a criss cross pattern. Roll the dough up to make a cylinder about 6 inches long, turn it on its end, and gently flatten it into a disk about 1 3/4 inches high. Do not overwork the dough.
Cut the dough into 6 or 8 wedges and place them on the prepared baking sheet. Bake the scones for 18-20 minutes, rotating the baking sheet halfway through, or until a toothpick inserted into the center of a scone comes out clean. Do not overbake.
Transfer the scones to a wire rack to cool completely. Place the baking sheet with the parchment still on it underneath the rack.
Assemble the Nutella Scones:
Heat the remaining 1/4 cup Nutella in a microwave until pourable, about 10 seconds on high. Pierce the tops of the scones a few times with a fork. Use a spoon ( or two spoons-one to scoop, one to scrape) to drip the warm Nutella in a zigzag pattern over the tops of the hot scones. Transfer them to a refrigerator to set for 5 minutes, then serve immediately.
Most scones have a lifespan of 24hours or less; however, these scones taste pretty darn good on day two provided you wrap them tightly and store them at room temperature.
*Baked Note*
Matt & Renato’s advice: Do Not Knead Too Much. Stop working the dough the minute it comes together and don’t worry if there are a few dry bits scattered throughout.
February 26th, 2012

Okay… I know… I was supposed to post these on Feb 15. I actually made them before that. I even asked Josh to upload the pictures so that I could post before the Feb 15 date, but alas…. my blog post never came to fruition. I thought that after defending my dissertation I would have all the time in the world to bake and blog. Well, that was all just a huge fantasy I suppose. Anyway, so here I am… having accomplished a fair bit of schoolwork and housework, so I figured even though it is way late, I should post about those delicious caramels. Caramel has been my flavor of choice lately – I love anything caramel, particularly salted caramel. One of my favorite cupcakes of all time were those
Martha Stewart Chocolate Salted Caramel Mini Cupcakes and I love that super rich
Sallted Caramel Chocolate Layer Cake that I have made three times, despite it’s difficulty! So, when it came to making these soft candy caramels I was definitely in! What a great pic by by Teri of
The Freshman Cook!
I have made caramels before, but for some reason I always seem to have a hard time cutting them and usually completely give up, despite having gone through all the work of actually making them. This recipe was completely different… maybe it was the soft texture, or the fact that I actually followed their directions for using some cooking spray on the knife before slicing. Whatever it was…. these were so easy to cut and wrap.

These caramels had 1 cup of light brown sugar in them. Maybe this is what made these so tasty. I don’t remember using brown sugar in the caramels I have made before… maybe I am just forgetting those disasters though! It didn’t bubble up as much as usual when I added the cream and condensed milk. I was a little worried that my thermometer wasn’t working. I haven’t had much success with recipes that required certain temperatures recently and so I have been blaming that on my thermometer, but this time… things seemed to go okay.

Once it was it was back up to 250 or so I removed it, added the vanilla and salt (oh how I love the salty-sweet combo). I think I added a little more than the requested 1 tsp.

It took all my will-power to resist just eating this with a spoon…. Now that I think of it, this might have been a good recipe to use for the scoopable caramel I tried to make around the holidays. A friend of mine had brought me some salted caramel from Paris. It came in a little jar with a spoon and boy was it tasty. It may have been the reason why I was actually able to finish my dissertation :-) I tried replicating it and it just did not work… this recipe might have worked though… Next time I am going to try it.. pour this right into a little jar and see if I can eat it with a spoon. Yum!!!! Anyway, the next morning I dumped the block out to cut it. I did have a bit of a problem getting the foil off, but it wasn’t too bad.

That big peak near the center was the result of sticking to the foil. It wasn’t too bad. Since it was Valentine’s Day I thought I might bring these to my class. I bought some red and silver wrappers and began cutting and wrapping.

My students (and colleagues) really liked these. And of course… I loved them. This recipe is definitely a keeper! Next time I think I might try to wrap these in clear wrap so you can see the caramel goodness!
January 24th, 2012
So, I thought it would only be right to drink my semi-homemade root beer float in my Yankees mug in honor of Jorge. Today Jorge Posada officially announced his retirement. So, while his teammates and friends chose to honor him with kind words, I figured what better way than to celebrate his career than to drink my semi-homemade root beer float in the Yankees mug that I got from my friend Wendy (BTW, it was a wedding party gift and her husband is a Red Sox fans…. I’m surprised he even allowed this in their apartment!).

Anyway, the other day I made some homemade vanilla ice cream for a party we had at my office. It has become somewhat of a tradition to have root beer floats and so I made a cake (a 6-layer version of
the same cake I made a few months ago) and I made some homemade vanilla bean ice cream for our floats. I got the recipe right from the
recipe book that came with my Cuisinart ice cream maker. I did not make the root beer, hence the “semi-homemade.” These were actually quite tasty! I love the vanilla bean (although it is somewhat expensive, Â I think it really does add to the flavor).

So, here’s to Jorge! Hip-Hip-Jorge! Hip-Hip-Jorge!

November 15th, 2011

It wasn’t until I met Josh that I had even heard of Buckeyes. I think the idea that us people on the coasts have never heard of these is true! Now that we are in Michigan I hear a lot about Buckeyes – not always in good ways, although I do like the
MSU Dairy Store’s Buckeye Blitz ice cream – that is good! Now that I have my own ice cream maker I might need to try my hand at that one. Anyway, Since part of Josh’s family is from Ohio and some still live in the Ohio/Pennsylvania area these little tasty treats get made pretty regularly around the holidays. So, when we asked Josh’s grandmother to gather up some recipes and make us a family cookbook when we got married one of the recipes was his Aunt Amy’s Buckeye recipe – man, oh man – those Buckeyes are SO GOOD! The recipe makes a ton of them – 200 (or 100 in my case because I make them huge). So, when I saw that the
CLUB: Baked second Nov pic hosted by none other than Karen the organizer of Club Baked (Check out her post on
Karen’s Cookies, Cakes, and More) was Buckeyes, I was both intrigued and worried – I mean, I love the other recipe. I was worried I wouldn’t like this one as much. I must say though, now that I have made both that they are both good, definitely different, but both of them are good. Aunt Amy’s are sweeter than the Baked ones, which I guess makes sense since this was supposed to be a less sweet version that the ones his mom made. Anyway, even though I am in the furies of dissertation writing (I am sending it out to my committee this week!) I had to take the time to post about these. I actually made them a few weeks ago. I decided to freeze them and I am going to bring them to my parents for Thanksgiving.

Okay, so here’s one big difference right here. In this recipe there are graham crackers… definitely makes the texture a little different than the other recipe. Also, there is cream cheese in these ones. Amy’s just have the peanut butter, margarine and sugar, and of course the chocolate.

Yummy! Look at that. Oh yeah, I did end up getting a new Kitchen Aid mixer. So, now I have two. I couldn’t resist the price on this back in October at Sam’s Club and I love the red!

Here they are ready to go. I used a little ice cream scoop to get them to be pretty uniform in size. I still had to roll each one of them after they were all scooped. These were not that easy for me to dip. I used a few different skewers and the peanut butter ball kept sliding off and right into the chocolate. :-( This did not make Lorraine a happy camper! I have this same problem when trying to make cake pops! I am not sure what my problem is! Eventually, I was able to get most of them dipped into the chocolate. Josh and I had a few and then plopped the rest in the freezer.

Okay, now that my mouth is watering… back to the dissertation writing!
October 3rd, 2011

I wasn’t sure that I was going to have time to make the
Club: BAKED choice, but they sounded so good I had to do it! I know I am a few days late with my post, but I was at a meeting in Illinois and totally forgot to get my post up (even though I made these about a week ago). Thanks to Billie atÂ
Chocolate & Chakra for this one because it was so good.  I actually opted to do the opposite of what most people usually do – rather than halving the recipe –  I doubled the recipe this time around! I thought that despite what the book said about these being best eaten right away, that I would freeze these to eat each morning for breakfast.  We did of course each eat one right away, but then I froze the rest – 2 each in small pint-size freezer bags. See that can of pumpkin in the first picture? That was the only pumkin I could find. I’ve heard there is a
shortage of pumkins this year with all the bad weather, particularly in the Northeast…. I think I will start stocking up. Here in Michigan I’ve noticed lots of pumkins for sale, but not much canned pumkin on the shelves. We are going to my parents for Thanksgiving this year, but I am sure I will still want to make my own pumkin pie at some point.
Anyway, these cooked up so well… and they smelled amazing when I took them out of the oven. I was debating whether I wanted to use muffin/cupcake liners because I hate when things stick to the pan, but that did not happen to any of these beauties.

Josh and I decided to each have one with a cup of tea. We had just bought a new tin of loose tea… not big fans of the tea, but loved these muffins. I love the cayenne flavor – not too overpowering, but enough so that you can really taste it! SO good!

I am also really glad I decided to do freeze them. In the morning I’ve been taking out one bag and placing the two muffins in the microwave for about 90 seconds. They are so good with a little bit of Earth Balance butter. It also makes me feel better about spending time baking… I should be cutting back so that I can finish that pesky dissertation! These served the purpose of not only feeding my baking addiction, but providing me with quick tasty breakfast for a while!
September 15th, 2011
Look’s like it is a two-post day. Since I got some good dissertation work in today I don’t feel too bad. Not only was it time to post for the Martha Stewart Cupcake Club today, but it is that time again for the Club: BAKED post and I almost forgot to post these today! This time around Stephanie at Ice Cream Before Dinner picked Bananas Foster Fritters. So, I made these a while ago and didn’t have as much success as I would have hoped. I was excited to try my hand at frying again. I had pretty decent success with the doughnuts a few month ago, but this one… not so much.

Everything seemed to be going fine, but I am guessing the oil temperature just got too hot because I had to take the fritters out so they wouldn’t burn. I took them out and from the outisde they looked pretty good.

But, check out the inside… Not quite done! I decided to plop them in the oven and although I don’t have another picture they did cook up some more and weren’t as mushy inside. Anyway, in the end they did taste pretty good.

September 5th, 2011

Yep that’s right – I actually made my own ice cream. I had been eyeing an ice cream maker for a while and so before the summer was over I thought I’d splurge. I bought the
Cuisinart ICE-21. It makes 1 1/2 quarts. I haven’t made anything recently, but have collected up some pictures of my various creations so I could post about them at some point. By the way, that photo above was from my first attempt. Josh touched up the photo and made it look a little retro. For some reason making ice cream seemed retro to me!  Anyway, I thought I’d try the big three – ice cream, frozen yogurt, and sorbet. The first thing I made was the ice cream – Josh’s favorite – Mint Chocolate Chip.

I know it doesn’t look too good hear – it looks a little runny, but that is because this was right after it came out of the machine. I decided right after this to let it sit in the freezer for a while, but didn’t take any additional pictures. What a difference that made – it hardened up quite a bit and was like a store bought hard ice cream, but better because I actually made it!
Next up was the sorbet. I couldn’t find a picture of my sorbet by itself. So, if you looked at my waffles post you have already seen this. I decided to try a Mexican Chocolate Sorbet. I wish it had a little more kick. I used spicy choclate and I added cayenne pepper. I guess next time I’ll have to add a little more cayenne.

And finally…. the frozen yogurt. I thought that trying a frozen yogurt would be nice because frozen yogurt is probably a bit better for you than ice cream and I thought I could make a nice summer flavor. I decided to go with one of my favorite fruits – strawberries. Of the three, this was my favorite. I liked the Mint Chocolate Chip, but I think I liked the texture and consistency of this frozen yogurt better.

In addition to this strawberry frozen yogurt being tasty the photo became quite popular. Josh used this as one of his pictures of the day on Smugmug and it got a ton of comments. Of all the pictures we have up it is the second most popular. Check out this one and our other photos
here.
September 2nd, 2011
So, I am a day late posting the September 1 Club: BAKED choice, but better late than never! I actually made it on Sunday. This time Brooke from Brooke’s Bountiful Kitchen picked Boston Cream Pie Cake. I didn’t follow the recipe exactly. I decided to make a 6-layer cake since I had three 6 in. round pans. I had just made my first 3-layer cake the other day (which I will post about that soon – with the start of school and trying to get work done I am so far behind!) and so I thought why not try a 6-layer one. I must say I have never been a big Boston Cream Pie fan so I guess I enjoyed making this cake more than I enjoyed eating it… As you can see it was a little bit lopsided, but not too bad for a 6-layer cake. At least it didn’t topple over! You can see all the other Club BAKED posts for this cake here.