February 21st, 2011

Christmas in February!

I thought it was about time that I take  a little time  to put up some of the pics of the cupcakes I made around Christmas time.

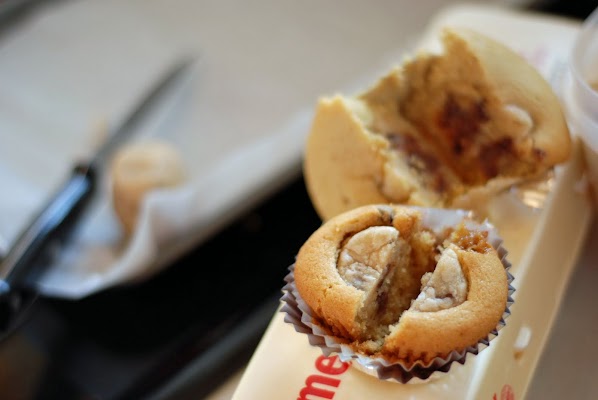
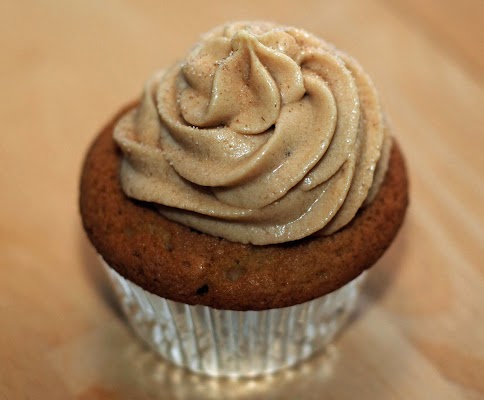
First, I had my dissertation proposal defense in December. It was at 9am and I wanted to bring something breakfasty so I searched the Internet for some pancake-like cupcakes and found these – Maple Buttermilk Pancake cupcakes. I did not top these with bacon as the recipe calls for, mostly because I just didn’t have the time (I still needed to go over my presentation again), but I did sprinkle some cinnamon sugar on top. Let me just say that of all the cupcakes I have made it seems like these ones as the exporession says “take the cake”, or in this maple_buttermilk_pancake_cu.jpgcake “take the cupcake.” These have gotten the greatest response of any cupcake I have made to date. Josh and my committee LOVED them! I decided to make them again when I subbed for the secondary intern methods class. They too liked them. They are a bit messy though… the sticky maple is so good th, it is worth it. FYI – my committee did approve my proposal!
One of the holiday cupcakes I baked was based on a Bakerella post I saw. I wanted to try to make something like this. I didn’t want them to look like Christmas trees too much, but more like winter trees. I think these came out pretty good, but they weren’t that easy to eat. The tree itself is made from the tip of a sugar ice cream cone. I dipped it it white chocolate and then sprinkled it with white sanding sugar. On some ofwinter_tree_cupcake.jpg
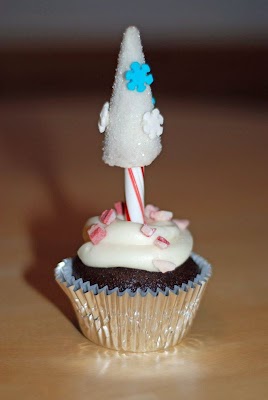
them I placed these big Wilton snowflakes. The cupcakes are devils food cupcakes with cream cheese icing. I sprinkled the icing with some Ande’s Peppermint Crunch Baking Chips.   I ended up bringing some of these to one of the schools I go to to observe interns.

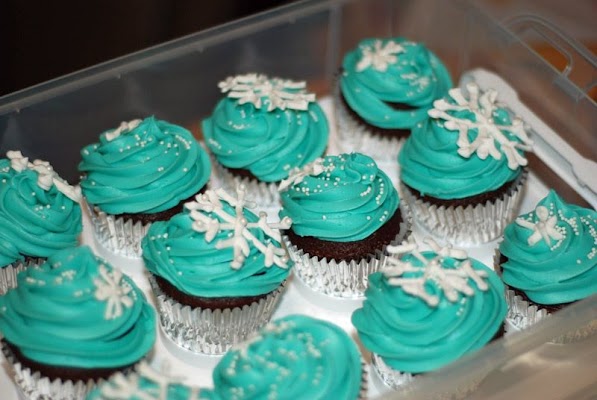
Since I was going to two more schools I figured I had to make some more cupcakes. I decided to try to make another winter-themed cupcake. So, I made some snowflake cupcakes. These were also devils food cupcakes with cream cheese icing.  I tinted the icing a teal color, sprinkled each with some white nonpareils, and placed snowflakes of various sizes on top. I made these snowflake toppers by first printing out some clipart snowflakes. I then placed a piece of wax paper over the clipart, and piped royal icing using the clipart as a guide. I’ve been using this royal icing recipe, which I actually first saw on the Sweetopia bog. Check out this blog if you haven’t already! It is great! I then used some pearlized sprinkles or sugar pearls and some shimmer dust to add a little something to each snowflake. I let the snowflakes dry overnight and then
snowflake_cupcakes.jpg

carefully peeled them off of the wax paper. I actually think of all the cupcakes I have made these are one of my favorites. I just think they looked really elegant for some reason. I brought these to two schools and they were a big hit!

The last cupcake I made in December was a Peppermint Bark Cupcake.  I was planning to bring these to a potluck, but we didn’t end up going to because the weather was bad. I ended up just bringing them with me to campus for a meeting I had the next day. I decided to make these because I had some left-over bark. I made this bark after being in Williams Sonoma and sampling some of their peppermint bark. Man was it good, but totally not worth the price they charged. so, I decided to make my own. When it came time for this potluck I thought I could
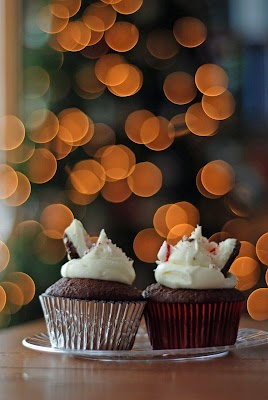
peppermint_bark_cupcakes.jpguse these as a topper. These were chocolate cupcakes with a peppermint ganache center, cream cheese icing and topped with some homemade peppermint bark. The picture was taken in front of our Christmas tree.

Posted under Uncategorized | No Comments
February 20th, 2011

Marshmallow Pops

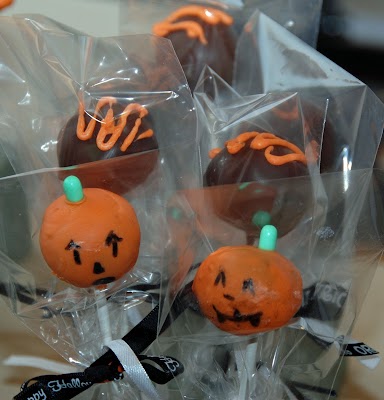
I have been trying to make cake pops for some time now, you know like the Bakerella ones, but have had limited success.  I sort of got them to work around Halloween when I made these Jack-O-Lantern ones, but had more success with the Dark Chocolate Mint ones. Those actually came out pretty good. You can see on the jack-o-lantern on the right that the chocolate cake was still visible. I think the problem was that I just wasn’t melting enough candy. The chocolate mint ones look pretty good though.

Halloween_cakepops.jpg

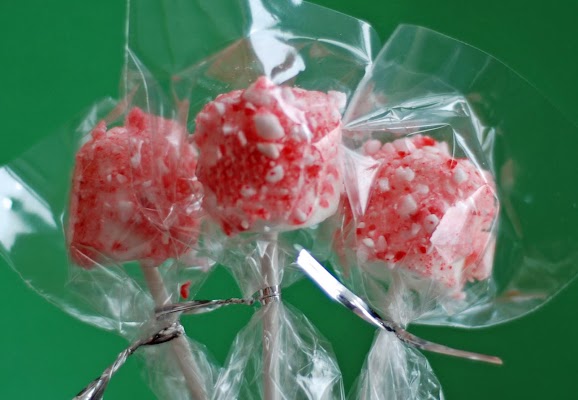
So, when I was debating whether I wanted to put together a little package of goodies for my colleagues in December, I thought cake pops… but then quickly thought…. no…. how about marshmallows instead of cake? I don’t even know what made me think of that, but I did.  These were so easy and although I thought I was making an original recipe I am sure these are out there somewhere. I made two types: Candy Cane Pops and  Smores on a Stick. The recipe for each of these is so easy.

candycane_pops.jpg

Candy Cane Pops
Ingredients: Directions:
marshmallows 1. Mix enough water into the powdered sugar so that it creates a sticky substance
powdered sugar 2. Put lollipop stick halfway into a marshmallow
water 3. Dip/roll marshmallow in powdered sugar mixture
crushed candy canes 4. Roll marshmallow in crushed candy canes to cover
6 in. lollipop sticks


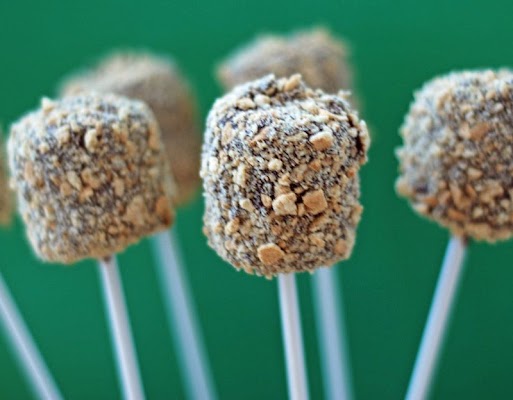
smores_ona_stick.jpg

Smores on a Stick
Ingredients: Directions:
marshmallows 1. Melt enough chocolate wafers in a deep bowl so that you can dip and remove the marshmallows in one motion
chocolate candy melts 2. Put lollipop stick halfway into a marshmallow
crushed graham crackers 3. Dip marshmallow in melted chocolate and tap excess chocolate off
6 in. lollipop sticks 4. Roll marshmallow in crushed graham crackers to cover

These were SO easy! I enjoyed the Smores one more. I will definitely make those ones again. I gave these to my colleagues and I know for sure some of their kids really enjoyed these.

Posted under Uncategorized | No Comments
January 24th, 2011

Hot Chocolate on a Cold Day

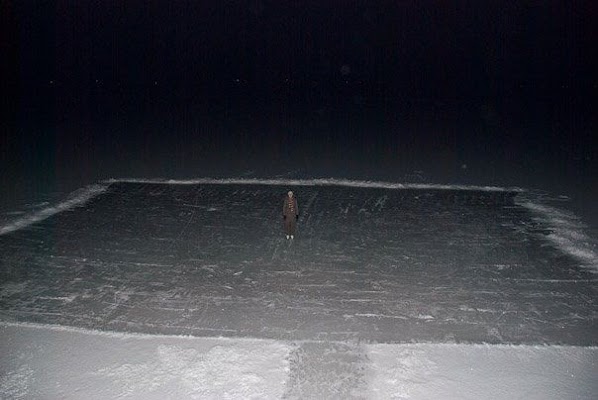
Just like the Chocolate Chip Cookie Dough Cupcakes I have been toying around with making some form of Hot Chocolate Cupcake for a while. So, I figured I had the perfect opportunity to try these out because this weekend we were having The Second Annual Males Family Skating Party on Lake Lansing. We live right on the lake and we clear off a spot to go skating. Here’s a glimpse of our own personal skating rink – yep – that is me in the middle with my ice skates on. The photo was taken in the evening so it does look a little creepy, but ice skating is so much fun…

Skating.jpg

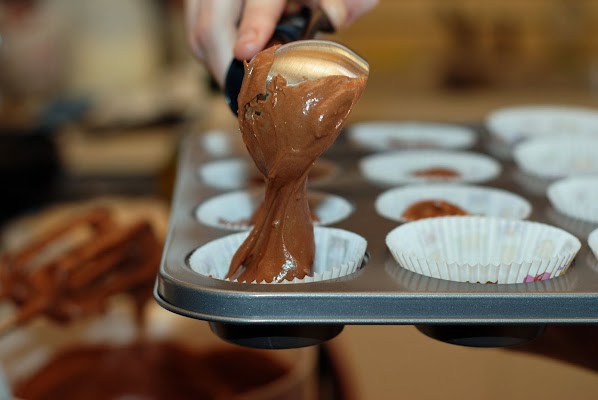
but…. back to the cupcakes, what you really want to see. I had been toying with the idea of making some Peppermint Hot Chocolate Cupcakes for our skating party… What I really wanted to find was some disposable plastic or paper cups with handles to look like little cups of hot chocolate. I knew I had seen these before, but I couldn’t find them anywhere… I even went to the new GFS Foods, but found nothing. I don’t know what made me check out the Staples website, but that is where I found what I was looking for. I found these little paper Solo cups and was able to have them shipped to the store so I didn’t have to pay any shipping. Pretty close to what I was looking for. Yay! So, I had my cups finally and now I needed to decide how I was going to make and assemble my “hot chocolate.” Since I could potentially have about 12 people I decided that I would put 2 cupcakes in each cup. I found a great “hot chocolate cupcake recipe from The Picky Palate. I decided not to do the mint kiss centers or the marshmallows. You can see the exact recipe and directions at the end of this post, but here is what I did. I mixed all the ingredients from the recipe for the cupcakes and filled all 2 cupcake tins… Look at how thick the batter was
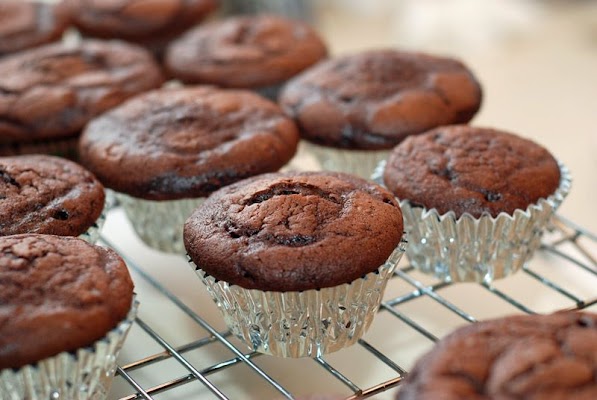
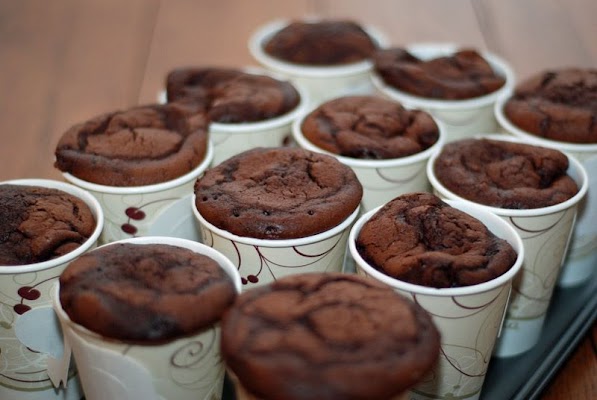
PeppermintHotChocolate01.jpgEven though I planned to take the liners off I decided to cook with them just because I didn’t want to mess with having to get these out of the pan.  I baked these for about 18 minutes and then let them cool. I may have filled these a bit too much because they poured over the top, but I think these big ones worked well as “top” cupcakes.

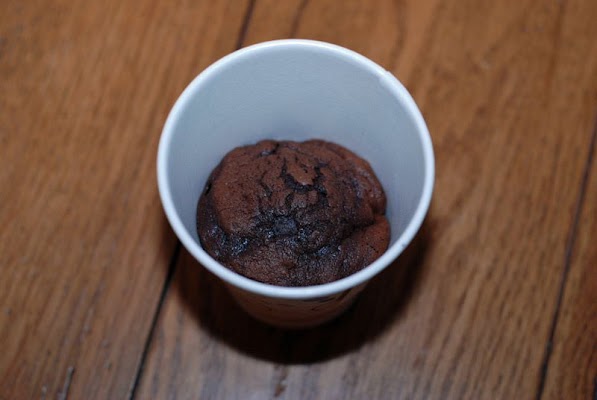
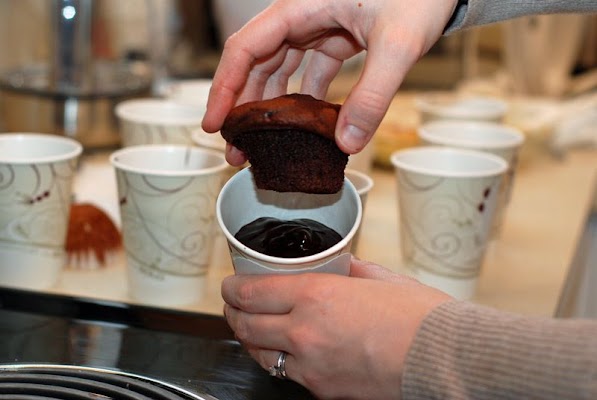
PeppermintHotChocolate02.jpgOnce these cooled a little I took the paper liners off them. I took one cupcake and placed it down into the bottom of the cup like this….

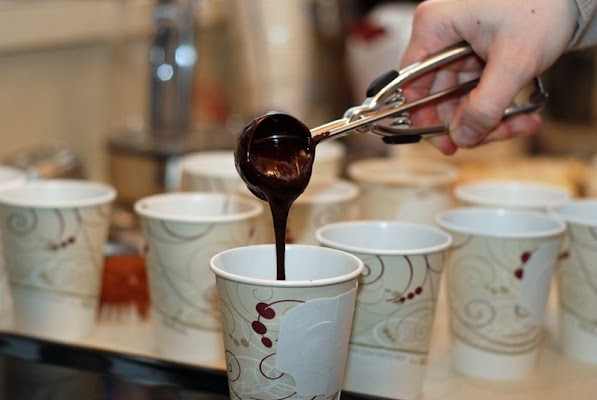
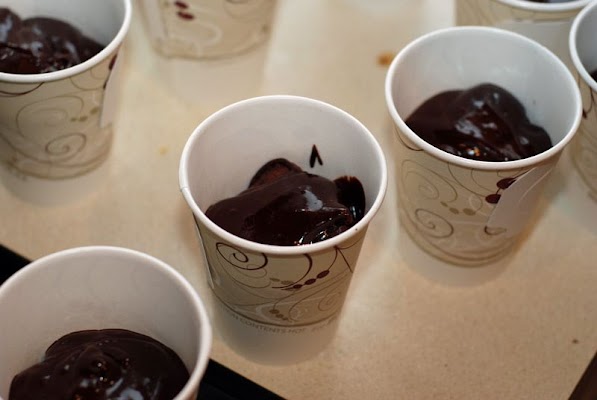
PeppermintHotChocolate03.jpgThen it was time for the ganache – I made a peppermint chocolate ganache. I wanted this to stay gooey so I didn’t let it set. If you wanted a firmer ganache you can let it set for about 30 minutes.  I used my little ice cream scooper to cover the bottom cupcake with the ganache.

PeppermintHotChocolate04.jpg

Look at how good these look!

PeppermintHotChocolate05.jpg

Then it was time for the top cupcake. I placed it right on top of the ganache.

PeppermintHotChocolate06.jpg

I now had all twleve ready and waiting for the whipped cream icing and a dash of peppermint toppings.

PeppermintHotChocolate08.jpg

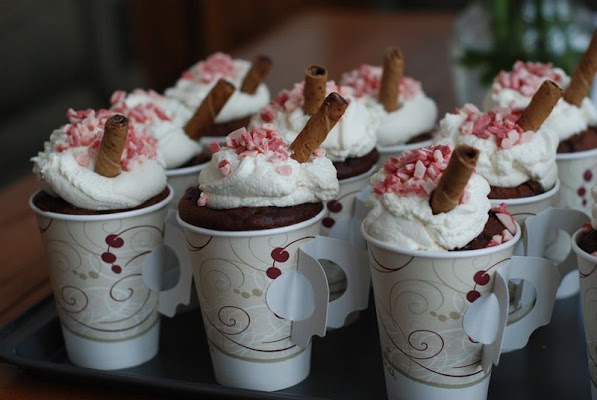
Now for the embellishments! I whipped up (pun intended) some whipped cream icing and plopped that on top with some peppermint baking bits and don’t forget the straw!

PeppermintHotChocolate09.jpg

These cupcakes had to be eaten with a spoon, but that is okay because with the whipped cream and all sometimes I like a spoon with my hot chocolate.

Peppermint Hot Chocolate Cupcakes [printable version]
Makes 24 Cupcakes (or 12 “cups of hot chocolate”)


Cupcakes* Peppermint Chocolate Ganache
1 Devils Food Cake Mix 1 C. heavy whipping cream
4 eggs 2 C. semi-sweet chocolate chips
1/2 C. olive oil 1/2 tsp. pure peppermint extract
1 small box instant chocolate pudding mix
1 C. sour cream
3/4 C. warm milk mixed with 1 packet hot chocolate mix
Whipped Cream Optional
2 c. heavy whipping cream peppermint baking bits or shavings
2 Tbl. powdered sugar Pirouettes (mint chocolate) for straws
2 tsp. vanilla
* adapted from The Picky Palate
To make the cupcakes
Preheat oven to 350 degrees F. Mix on medium speed cake mix, eggs, oil, pudding mix, sour cream, and mixed hot chocolate. Mix until well combined, about 1 ½ minutes. Scoop into 24 paper lined muffin tins about 3/4 full. Bake for 18 -20 minutes. Remove cupcakes and let cool for about 10 minutes.
To make the peppermint chocolate ganache
While cupcakes cool make the ganache by heating cream over medium heat to just about a boil. Remove from heat. Add chocolate chips and peppermint extract. Let sit for 5 minutes. Whisk until smooth.
To make the whipped cream topping
Beat heavy cream in a chilled bowl on high until thickened. Add the powdered sugar and vanilla and beat to the desired consistency.
To assemble the “cups of hot chocolate”
Remove the liners from the cupcakes. Place one cupcake in each of 12 cups. You may want to push the cupcakes down a bit so the top cupcake can fit. Using a small ice cream scoop, top each cupcake with ganache. Place another cupcake on top of the ganache. Pipe whipped topping onto top cupcakes without a tip so that it looks like a large dollop of whipped cream. It is also fine to just use a spoon to put a dollop of whipped cream on the top of each cupcake. Sprinkle with peppermint baking bits or peppermint candy shavings. Break six pirouettes in half and place one half in each cupcake.
Posted under Uncategorized | No Comments
January 20th, 2011

Studying the Rate of Tummy Expansion

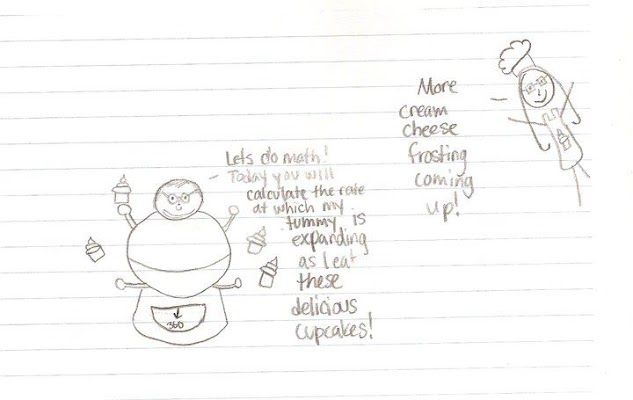
I just had to post this picture…. Remember the other day when I posted the e^x cupcakes? If not, you can find that post here. The day after Josh’s students had those cupcakes one of his students drew this picture… How cute! That is Josh  and his expanding tummy and that is me over in the corner making more yummy cream cheese icing.

RateofTummy.jpg

Posted under Uncategorized | No Comments
January 20th, 2011

Chocolate Chip Cookie Dough Cupcakes – MSU Style

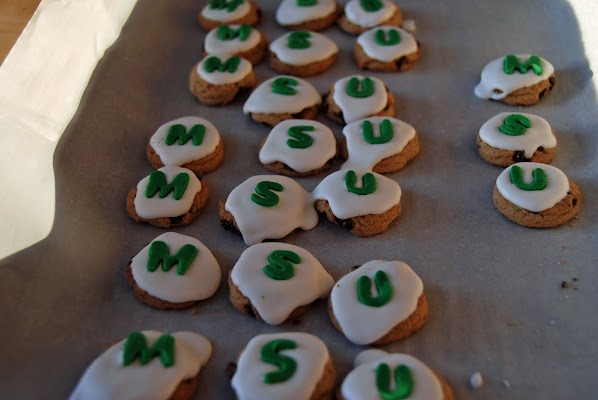
Now these cupcakes were fun to make (not quick, but fun!) I have been wanting to make some Chocolate Chip Cookie Dough (CCCD) cupcakes for a while, but just haven’t had the occasion…. so when I found out we were having a Math Ed Social for some recruits visiting the campus I figured this was the perfect opportunity! It took me a while to figure out how I was going to MSU-ify these CCCD cupcakes. I originally thought I would try to make some Spartan “S” cookies, but that didn’t  work out. I bought this mold, but it was a disaster – the dough just stuck in the mold even though I greased it… oh well… Maybe I’ll have better luck next time with cake batter. I also just found a smaller one that would have worked better to make cupcake toppers anyway…. So, I ended up deciding to decorate some mini-chocolate chip cookies with green and white royal icing and cut out some fondant letters for the MSU with my alphabet cutters. I did that the night before. The green ones came out a little better than the white – I think I was getting tired.

MSU_CCCD02.jpgMSU_CCCD01.jpg

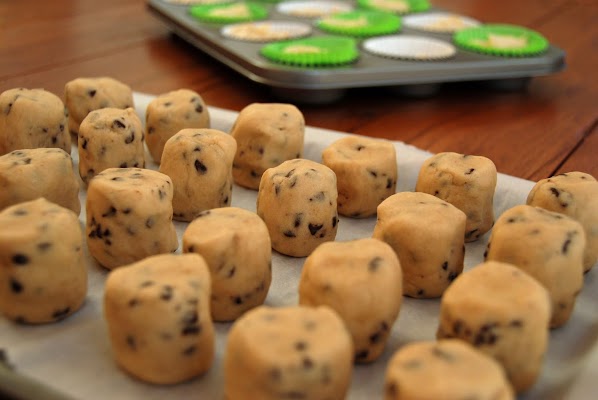
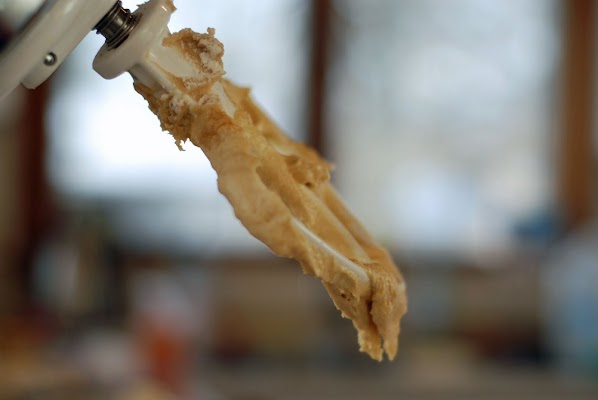
The day before I also prepared my cookie dough. A while ago I found a few recipes for these cupcakes and I ended up using this one from  kevinandamanda.com. The recipe required the cookie dough to be frozen overnight. So, on Sunday I prepared the cookie dough….. Now, this recipe was supposed to make 24 cupcakes…. I did a double batch, but I had a TON of cookie dough. I decided to make them into tubes since the recipe said that might work better to get the dough throughout the whole cupcake.

MSU_CCCD04.jpg

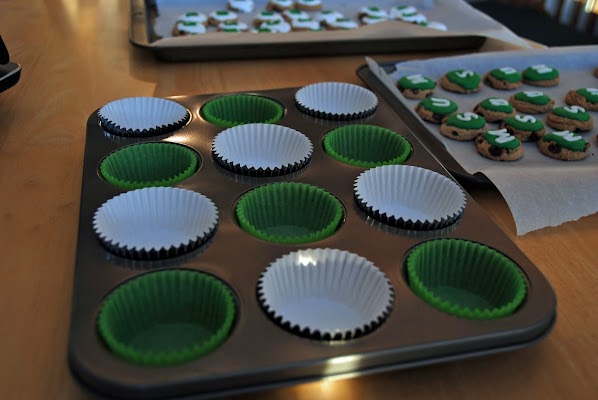
Yum! How good does that look? You can eat it just like this – the recipe uses milk instead of eggs so it doesn’t need to be cooked. The next morning I took these out of the freezer to place in my cupcakes. I got my cupcake liners ready – green and white of  course – to start making these cupcakes!

MSU_CCCD03.jpg

I made the batter in my trusty Kitchen Aid Stand Mixer and then filled each of the cupcake tins 2/3 full. I didn’t want to do a double batch in the mixer so I thought I would do two separate batches. In the end I ended up having more batter than I thought so I ended up making 36 cupcakes with one batch.

MSU_CCCD08.jpg

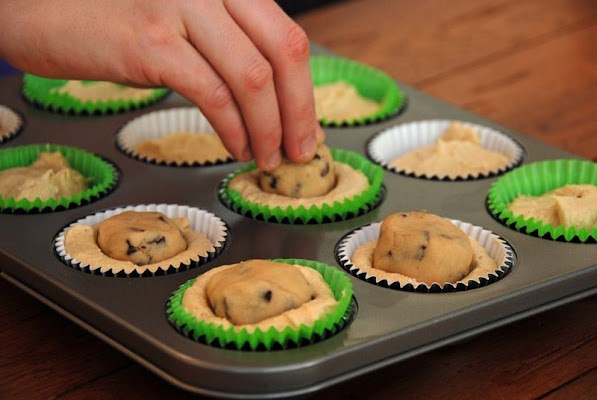
Here is the neat part! You just push one of the frozen tubes of dough right down into the center of the batter. After talking with Josh and looking at the first batch that came out of the oven, we decided that the dough was huge and that maybe I should cut each tube in half. So for the second set of 12 I did that.

MSU_CCCD05.jpg

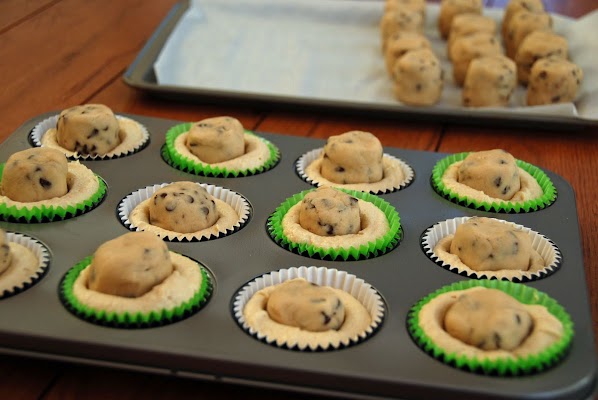
So, here is the before……

MSU_CCCD06.jpg

and here is the after…..

MSU_CCCD07.jpg

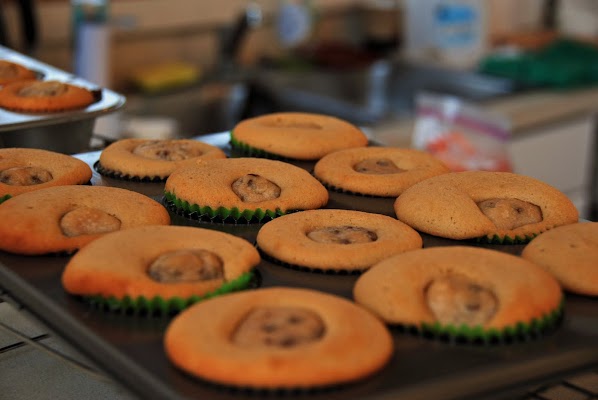
The cupcake batter was supposed to come up over the dough like this, but that didn’t happen. I guess I didn’t follow the recipe exactly – using a little less batter and a little less dough… Maybe that is why, but it seemed to me that more dough would have spilled over the edges like some of these did…. I figured it didn’t matter too much since I was going to put some icing on top anyway. I had to cut one open and see what it looked like. Pretty good – cookie dough from the top to the bottom.

MSU_CCCD09.jpg

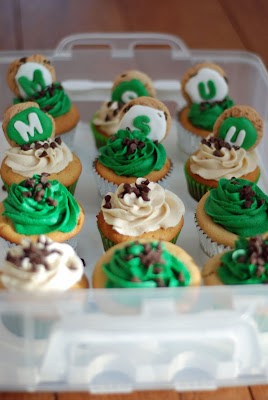
I usually go with my standard cream cheese icing, but this recipe had a Cough Dough Buttercream Icing…. so, I decided to tint half the icing green. It had some light brown sugar in it so it had that grainy cookie texture that really did the trick. I added my MSU cookies (just a few for this picture because I had to wait to put them on at the party so I could put the top on my cupcake carrier without squishing them. They looked so cute!

MSU_CCCD10.jpg

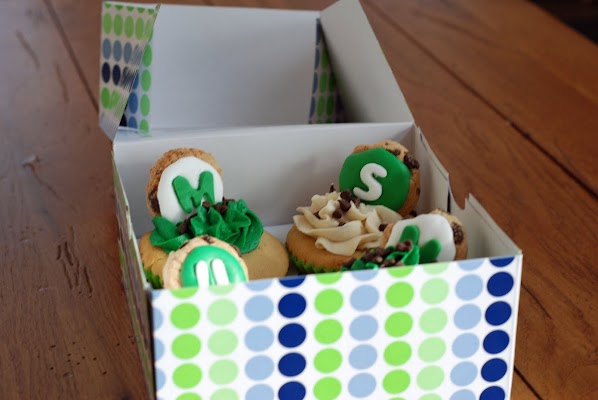
And one last picture for a friend of mine who couldn’t make it. I used my new Martha Stewart cupcake boxes from my uncles to package up 4 for her and her family.

MSU_CCCD12.jpg

I brought these to the Math Ed Social and they were a hit. Although, those that had the Maple cupcakes (which I still have to post about) still think the maple was the best though. Hopefully the recruits found these scrumptious enough to want to come to MSU – well, I guess there is a lot more important and good things about MSU to help them make that decision, but good cupcakes can’t hurt! :-)

Posted under Uncategorized | 2 Comments
January 14th, 2011

From Saratoga to Boston with Cupcakes (and Pizza)

Yes – still catching up… I know, I know, eventually I will be caught up and then who knows how long it will be between posts since I am working on my dissertation! I have already done a few posts from my friend’s wedding way back in October, but here is another one – the last one (I think). So, even though the other two posts were from NYC this one is from a place in Saratoga Springs. That is actually where the wedding was. The reception was at The National Museum of Dance.  We stayed write in Saratoga Springs and could walk from our hotel to the downtown area. Downtown Saratoga Springs in really cute! If you haven’t been there and you are near there it is worth a trip. I don’t know what it is like during race season. Anyway, I had to write about Bettie’s Cakes. This was one of the cutest little cupcakes shops I have been to. It was like an old fashion soda shop or something. I had seen the sign for a cupcake shop earlier in the trip. It was in this little mall-type thing. When we got into the mall we could see this sign…. Perfect…. it was leading us right to Bettie’s!

Bettie'sSaratoga1.JPGWoo! Hoo! Straight ahead. I loved that it was called a cupcakery cafe. How cute! Here we are – at Bettie’s yay! I thought it was so cute. The signs and the seating really had a cool retro feeling. If I had a cupcake shop…. this is what I would want it to look like!

Bettie'sSaratoga2.JPG

Look at those cute little tables and stools  totally cute and even though it was a bit chilly outside since this was a in a little mall you were still inside. So, that was nice.

Bettie'sSaratoga3.JPG

So, here is what we ended up buying… Yes, that is a lot of cupcakes, but we were going to bring some back to our uncles in Boston – we were not going to eat them all (at least we hoped not….). So, here is the Bettie’s menu. They don’t include all their flavors, but you can get an idea of their prices. In this picture you can see The Carrot Cake, The Milky Way (yep, like the candy!), The Peanut Butter Cup, Red Velvet, and their cute (Halloween inspired) Vampire’s Bite cupcake.

Bettie'sSaratoga6.JPG

Here’s the two we got to eat right away – Josh got the Carroty Cake and I had to try that Milky Way cupcake – yum! These were both very good. In comparison to Eleni’s in NYC I thought Bettie’s was much better!

Bettie'sSaratoga5.JPGOne last Bettie’s picture before we hit the road – that’s me with my cupcake. If only I looked like Bettie!

Bettie'sSaratoga4.JPGSo, what is this about pizza? Well, after we left Bettie’s we went to track down this pizza place, Marino’s Pizza, that our unlce said sold a really good cold pizza – I guess it is called the Tomato Pie. One of his co-workers raved about it. So, we figured we’d bring a one back to Boston with us. When we got there and described what we were looking for they didn’t really seem to know what we meant… A pizza that was meant to be eaten cold, huh? We thought we might have the wrong place, but then we figured out that they did in fact sell the Tomato Pie…. I guess they just don’t sell it as a “cold pie,” but she said it was good if eaten cold… Okaty, one tomato pie coming up… Sorry, no pictures of this one, but it was yummy (and yes, it and all the cupcakes survived the three-hour trip to Boston)!

Posted under Uncategorized | No Comments
January 10th, 2011

e^x isn’t so horrible… in fact it tastes good

DSC_3101.JPGI thought I would try to make some cupcakes this weekend since it was the weekend before classes started, but Josh and I are trying to eat healthy and so I decided not to… but then Josh said I could make some to give to his students.  He told me that he was joking around with his students last week when they were complaining about having to take the antiderivative of e^2x. They were saying “I hate e^x.” So, he responded, “Do I have to have my wife make you some e^x cupcakes?” So, here they are some tasty e^x cupcakes. Hopefully there will be no complaining about these e^xs, which were made out of blue, pink, and yellow vanilla candy melts. I piped the  e^xs and let them dry while I was making the cupcakes. I made 44 cupcakes – half German Chocolate and half Fudge Marble with my standard cream cheese icing. Here’s a look at some of the ones Josh will be taking to school tomorrow!

DSC_3095.JPG

Posted under Uncategorized | 20 Comments
January 9th, 2011

Lorraine’s Sweet Map

I thought it would be neat to keep track of all of the Sweet Places I have been to. I figured out that it would be possible to keep track of these using Google Maps/Google Earth and Picasa. So, whenever I go somewhere new I will update this map. If you click on the images you can see a snapshot of the place. So, check back every so often so see where I’ve been (I added a link in the menu so you can find this page easily)!

Lorraine’s Sweet Map

Posted under Uncategorized | 5 Comments
January 7th, 2011

Thank You for Reading!

Yes – I am still backlogged, but I thought I would put up this more recent endeavor… I saw these Cookie Cutters a few weeks ago on the Williams-Sonoma website. I don’t know why I was on the Williams-Sonoma site (we don’t often shop there because it is pretty expensive). I was probably looking to see if the amazing Breville Tea Maker had come down in price. Anyway, they had some really cute cookies cutters called Message-in-a-Cookie Holiday Cookie Cutters. I thought about driving to Williams-Sonoma before Christmas to see if they had these, but didn’t. Then, we got a Christmas gift from there and it came with a $10 gift card. So, between Christmas and New Years we decided to check it out. I ended up getting the non holiday version of these cutters – I thought they would be more versatile. Here is the link and these ones are still available online – the holiday ones are not (but you might be able to find them discounted in the store). Anyway, I was a little skeptical about these actually working. So, I figured I would try them out right away since Josh and I were going to try to do some no carb/no sugar eating for a while after New Years…

So, it came with three cutters and within each cutter it has a little thing that you press down that imprints letters on your cookie. It comes with some pre-made phrases like “Thank You” and “I Love You” and then it comes with 3 sets of alphabet letters (no numbers unfortunately).

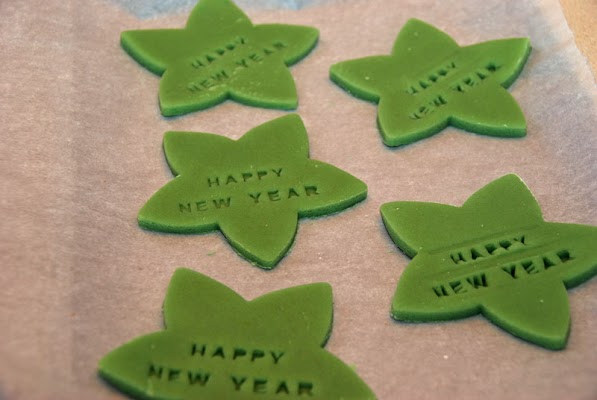
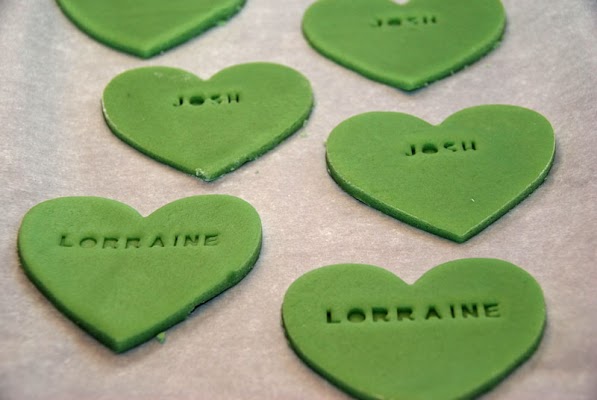
I followed their recipe and made some green sugar cookie dough. I cut out the cookies and then used the imprint to create some Happy New Years stars and then some Josh and Lorraine hearts. Here is what they looked like before I put them in the fridge to chill for 20 minutes or so… As you can see on one of those New Years stars… if you push too hard you can see the imprint of the lines that the letters slide into.

imprint1before.jpg

imprint2before.jpg

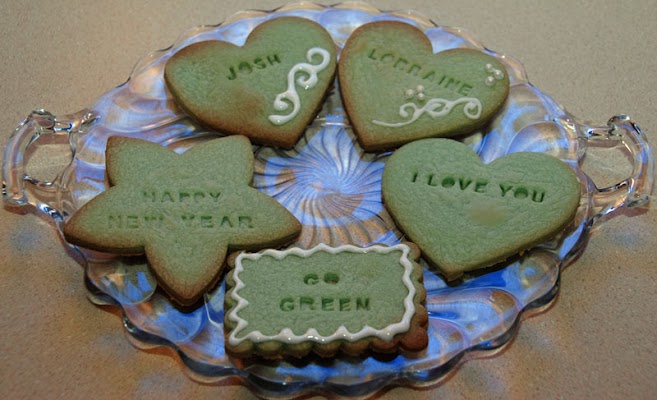
I made a few others with some scraps I had including a “Go Green” one since the dough was green (and for MSU of course!) and plopped them in the oven. Here is what they looked like when they were all done. I cooked them for a little too long. You can see the brown on the edges. Once they were cooled I then did some decorating on them just to see what it would look like… not too bad for a first time… I guess these do work.

imprintsafter.jpg

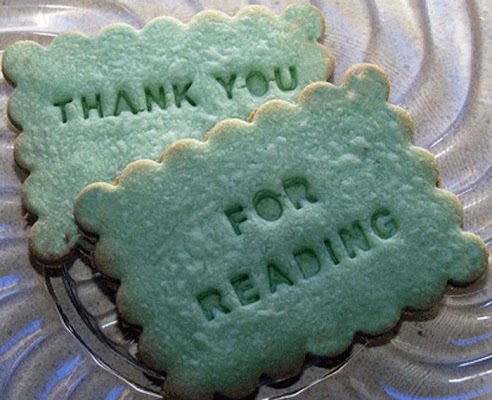
And… last but not least…. this ones for you!

ThankYouForReading.jpg

January 2nd, 2011

Eleni’s @ Chelsea Market

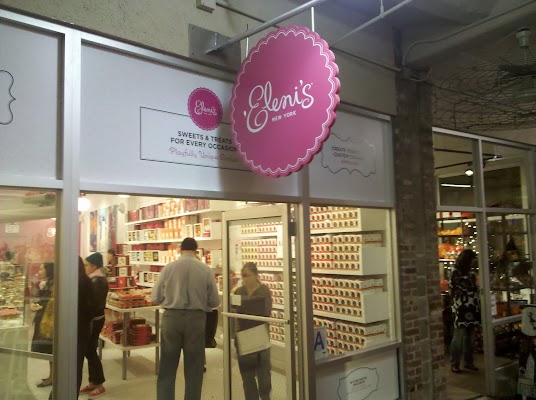
Once again… some more pictures from my NYC wedding trip from way back in October! These ones here are from a trip we took to Chelsea Market. In all the time I lived in NY and visited the city I had never been to Chelsea Market. It was pretty neat. We went there looking for a chocolate thermometer and I spotted this cute cupcake shop – Eleni’s.

ElenisChelseaMarketNYC.jpg

I really wish I would have blogged about this sooner because all I know is we got two cupcakes and shared them, but I can’t tell you what they were or how good they were. I remember them being pretty tasty though.  Check out their website though to see what they carry. Their cookies are so cute!  I really love those snowflake ones! I do also happen to have a not so good picture of the cupcakes (looks like they were chocolate cake of some kind) and a jug of milk we got from  Ronnybrook Dairy.

ElenisChelseaMarketNYCcupcakes&milk.jpg

Posted under Uncategorized | No Comments
LorrainePhD Welcome to
PhDcupcaker,
my site devoted
to all things
cupcake (and
other sweets)!
 
When I started this blog I was
on my way to earning my PhD
in mathematics education. Since
then, I have earned my PhD and
moved from one B1G Ten school
Michigan State, to another, The University of Nebraska in Lincoln.
Hopefully as an assistant
professor I'll still have some
time for cupcakes.
 
If you are looking for my professional site you can find it at: http://lorrainemales.com

Subscribe to Posts via RSS

RSS Feed

Subscribe via e-mail

Enter your email address:

Delivered by FeedBurner

Archives

QR Code Business Card