September 2nd, 2011

Salty Sweet Chocolate Salted Caramel Layer Cake

ChocolateSaltedCaramelCake-6.jpg

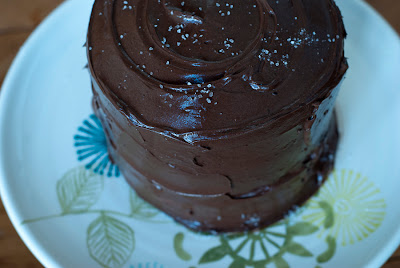
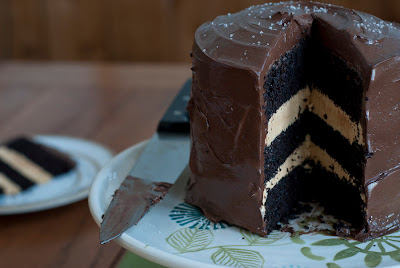
As you can see above I decided to go a bit out of my comfort zone and bake a cake rather than cupcakes for our anniversary last week. I started using Pinterest to keep track of the things I find on the Internet. [It is actually pretty neat. You can follow me on Pinterest by clicking here.] Anyway, I found this great blog, Sweetapolita on someone’s board. Not only does this blog have amazing sweets, but the photos are great! I had never made a 3-layer cake (at least I don’t think I have – If I did, I guess it wasn’t very memorable).  So, when I saw this Salted Chocolate Caramel Cake I had to give it a try. I was a big fan of the Chocolate Salted Caramel mini cupcakes (you can see my post here) from the Martha Stewart Cupcakes book so I figured I would really like this cake. And boy did I…. I started by baking three 6 in layer cakes. I had to buy two more 6 in. round pans (so expect to see a lot of 6 in layer cakes!).

ChocolateSaltedCaramelCake.jpg
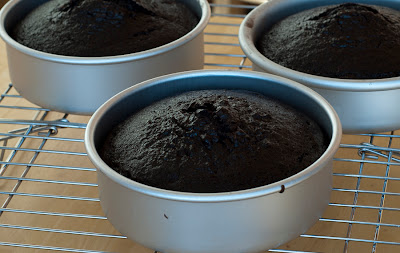
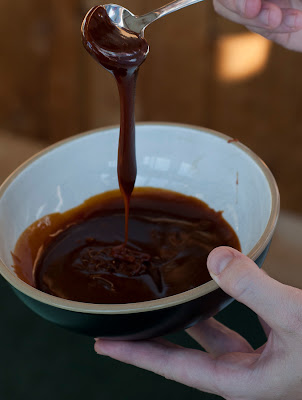
I got some serious doming on these cakes. I think it is because our oven doesn’t heat very evenly. I can’t remember if I placed these on some cookie sheets, but I read somewhere that it might help. It wasn’t a big deal though because I was going to layer this and so I could just cut the dome off. This cake was filled with a salted caramel buttercream. So, first I had to make the caramel. I love caramel. It looked so good! I had to restrain myself from just eating it all right from the pot I made it in. Let me tell you, it took some serious will power!

ChocolateSaltedCaramelCake-2.jpg
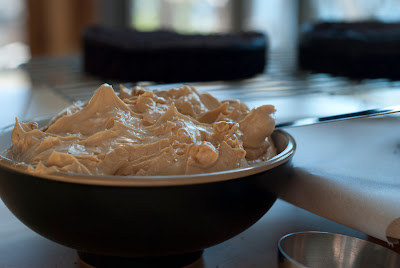
Making the filling was a little complex, but it was well worth it. After making that tasty caramel I set it aside to cool. In my trusty Kitchen Aid mixer I creamed the butter and then had to transfer it to another bowl, wipe the mixer clean with lemon juice, and put the egg whites and the rest of the sugar in the bowl over a pot of simmering water… Lots of work over simmering water for this recipe… Once this got to about 160°  I took it off and placed it back into the mixer and whisked for about 5 minutes until stiff peaks formed. Once this was done and cooled I added the butter back into this a cup at a time.  Finally I was able to add that cooled caramel. This filling was so good!

ChocolateSaltedCaramelCake-3.jpg
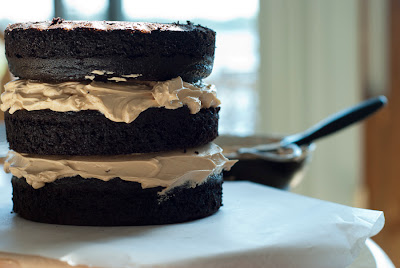
I then made the dark chocolate fudge frosting. In the recipe there was the option to make a chocolate swiss meringue buttercream which was supposed to be less dense, but I went with the chocolate fudge frosting. This was very similar to Martha Stewart’s chocolate frosting that I have made many times before and think is one of the best chocolate frostings! Now it was time to start assembling the cake. I shaved the little dome off each layer and started to place the layers down and put the filling between each layer using an offset spatula. I didn’t have a cake turntable, but had a wodden turntable that I thought would be helpful so I assembled the cake on that. The filling part wasn’t as bad as I thought it would be.

ChocolateSaltedCaramelCake-4.jpg
Once the filling was done I did a crumb coat layer with my chocolate frosting and put it in the fridge for a while. When it was ready I took it out and put on the final coat of frosting. Putting it on the turntable really helped when putting the final coat on. So now it was ready to chill in the fridge. Since it was our anniversary we decided we’d go to dinner. We had a Groupon for this place Gracies’s which we heard was pretty good. So, we decided to go there for dinner. Right before leaving, I took the cake out of the fridge since the recipe said it should sit at room temperature for two hours before eating. When I took it out I sprinkled it with some more sea salt. Here is what it looked like before we took that first piece out.

ChocolateSaltedCaramelCake-5.jpg
By the way, I got that cake plate at Meijer. It was on sale and it was perfect! I must say, this cake was not easy to make and at first I wasn’t sure all the work was worth it, but in the end I decided it was. I loved the taste and I think it looks pretty elegant. Here’s to many more good years with Josh and good layer cakes!

Posted under Cakes | No Comments
September 2nd, 2011

Boston Cream Pie Cake [Club: BAKED]

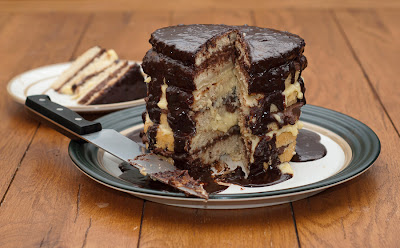
So, I am a day late posting the September 1 Club: BAKED choice, but better late than never! I actually made it on Sunday. This time Brooke from Brooke’s Bountiful Kitchen picked Boston Cream Pie Cake. I didn’t follow the recipe exactly. I decided to make a 6-layer cake since I had three 6 in. round pans. I had just made my first 3-layer cake the other day (which I will post about that soon – with the start of school and trying to get work done I am so far behind!) and so I thought why not try a 6-layer one. I must say I have never been a big Boston Cream Pie fan so I guess I enjoyed making this cake more than I enjoyed eating it… As you can see it was a little bit lopsided, but not too bad for a 6-layer cake. At least it didn’t topple over! You can see all the other Club BAKED posts for this cake here.


BostonCreamPieCake.jpg

Posted under Other Sweets | 9 Comments
August 21st, 2011

Waffling Around

Waffles – Part 1

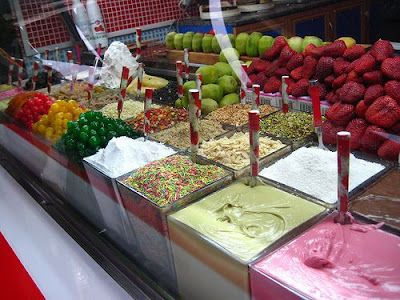
Since coming back from Turkey I have been wanting to make waffles, but not just any kind of waffles – waffles like the ones we had in Bebek! We were travelling around with a friend of ours in Istanbul and we went to walk around near the university she went to (which was right on the Bosphorus!) Not only did we enjoy a beautiful walk, but we also got to try these amazing waffles. Here is a picture I found on the Internet of a waffle shop (not sure this is the one we went to, but it was set up just like this)

waffle02.jpg
  Basically,you get a rather thin waffle (but not as thin as a crepe) slathered with your choice of toppings – you can get various spreads (chocolate, white chocolate, strawberry, hazelnut, …) and lots of toppings from fruits to nuts to various candies. I didn’t even know where to begin. It was so good.

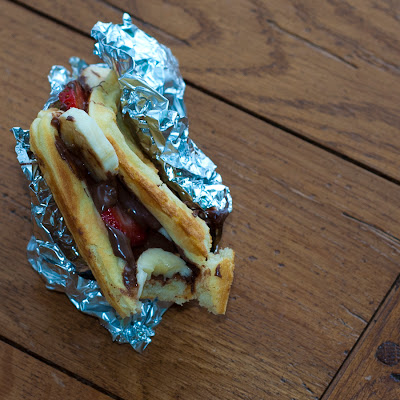
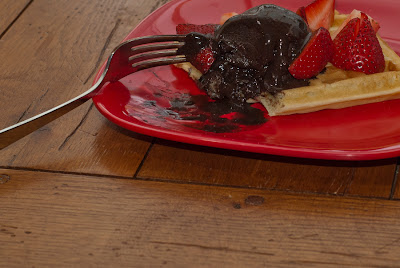
My friend talked about trying to make these at home using nutella as a spread. I thought that was a great idea. So, I figured I would try it. I couldn’t wait for dessert so I made them for an afternoon snack. I knew I wasn’t going to be able to make the waffle as thin, but that was okay… it would still be tasty. So, I got out my waffle iron and made up some waffles. I decided to try and recreate the fairly simple one we had in Turkey – nutella with strawberries and bananas. Yum! Here is what it looked like…

Waffle1.jpg
Josh and I each had two waffles. Although they were good, I must say they were not as good as the ones we got to enjoy in Bebek with some good friends!

Waffles – Part 2

I still had some waffles from my Turkish-style waffle adventure earlier in the day so I decided to use the waffles for dessert. I made some Mexican Chocolate sorbet (will post about my new Ice Cream maker soon!) and so for dessert I decided that a sorbet-topped waffle was in order! I put the waffle in the microwave for about 30 seconds and topped it with a scoop of sorbet and some fresh strawberries! Yummy!

Waffle2.jpg
I haven’t eaten this many waffles since I worked in a boarding school and got brunch in the dining hall! I guess I’ll have to start making them more often!

Posted under Other Sweets | No Comments
August 15th, 2011

Happy Birthday Josh!

This post is not going to have pictures of any cupcakes. I know what you are thinking… this is a cupcake blog… that is what you came here for. Sorry! This post is a Happy Birthday post for my husband Josh. Today is his birthday! I did make him some cupcakes, but won’t be posting about those today, but I can give you a little teaser… here it is.

pbandj.jpg
Josh definitely deserves a Happy Birthday wish on here because he is the one that usually takes all the photographs for me. He has gotten into photography recently and has been participating in the smugmug daily photos. You can check out all of his pictures here: http://themales.smugmug.com/ including his dailies (you might even catch a glimpse of one of my cupcakes) and you can also join me in wishing him a VERY Happy Birthday!

Posted under Cupcakes | No Comments
August 10th, 2011

Rhubarb Cupcakes with Whipped Cream [MSC]

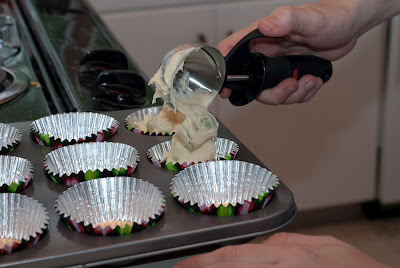
RhubarbCupcakes.jpg So, I know I haven’t posted a Martha Stewart Cupcake Club post in a while…. I’ve been pretty busy, but when Simple Girl said she was looking for some summer picks I thought that was just what I needed to kick-start myself. So, I volunteered to host in August and picked one of my summer favorites – Rhubarb Cupcakes with Whipped Cream! I actually tried these for the first time last summer and I must admit I don’t know that before trying these that I had ever eaten rhubarb. I decided to make these again this summer since they were such a hit last year. Like I did last year, I used some fresh rhubarb from my advisor’s garden. Since I’m the host this month I can post the recipe (which is at the bottom of this post), but if you like this recipe or any others you see on the MSC blog I would really encourage you to buy the book. You can get it on Amazon right here  RhubarbCupcakes (2 of 6).jpg for less than $15. The recipe calls for taking off the cupcake liners before serving, but  I finally found the Reynolds StayBrite cupcake liners and I really liked this pattern so I decided to keep the liners on. I was definitely impressed by these liners.  I was looking for them for a while and finally ran into them at Kroger. They definitely stayed bright! I am guessing that foil inside helped.  Here are a few action shots Josh got – me dumping the rhubarb into the batter and filling the liners.
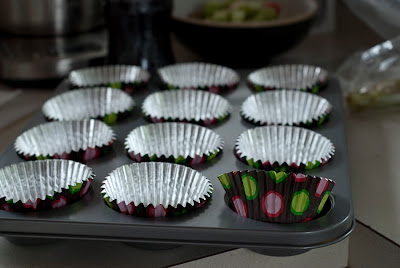
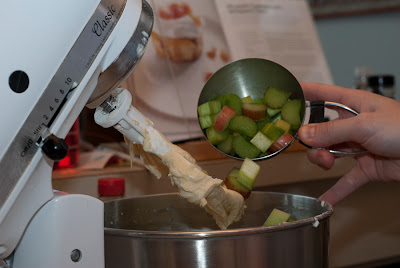
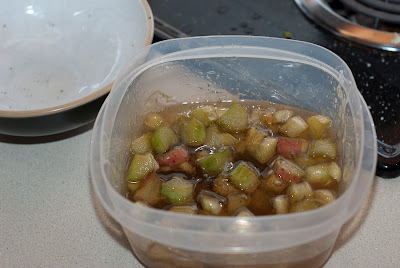
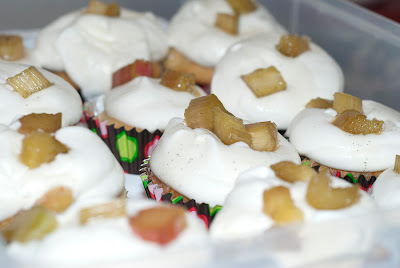
RhubarbCupcakes (3 of 6).jpg Doesn’t that rhubarb look so good? I love how chunky the batter is. You can tell when you areRhubarbCupcakes (4 of 6).jpg filling the cups that each bite is going to be full of tasty rhubarb. I love it! I popped these into the oven and then began working on the rhubarb topping. Another good thing about my trip to Kroger was that I found vanilla beans! The last time I searched everywhere! I was about to give up, but I finally found them at a health food store, but they were not cheap! Needless to say I was very happy to find a more inexpensive Kroger brand. I really do think using the vanilla bean adds a lot to the rhubarb topping (at least to its appearance anyway). I just  love how youRhubarbCupcakes (6 of 6).jpg can see the little specks of vanilla! I was planning to bring these to a meeting I had early the next day so since the recipe said you could store the topping in an airtight container, I decided to make the cupcakes and topping the night before and wake up early to make the whipped cream. The topping did get a little hard in the fridge, but a little stirring helped that. I also probably didn’t wait for it to get to room temperature completely like the recipe indicates. In the morning I made the whipped cream and assembled my cupcakes. I ended up doubling the batch because I was bringing these to a meeting with about 20 people or so. So, I packed up my trusty Martha Stewart cupcake carrier (minus a few cupcakes that I left home for Josh and I).
RhubarbCupcakes (3 of 3).jpg

I think these are one of my all-time favorite cupcakes. I love the soury-sweet taste! Thanks to everyone from the Martha Stewart Cupcake Club for baking along with me this month! I hope you all enjoyed your cupcakes! And as promised, here is the recipe:


Martha Stewart’s Rhubarb Cupcakes with Whipped Cream [printer-friendly]

Makes 16 cupcakes

Cupcakes

Ingredients

  • 1 ½  cups all-purpose flour
  • ¼  teaspoon baking soda
  • ¼  teaspoon baking powder
  • ½ teaspoon coarse salt
  • ½ cup (1 stick) unsalted butter, room temperature
  • 2 cups sugar
  • 2 large eggs, room temperature
  • 1 teaspoon pure vanilla extract
  • ½ cup sour cream, room temperature
  • ¾ pound rhubarb, stalks trimmed and cut into ¼-inch dice (3 cups)
  • 1 vanilla bean, halved lengthwise
  • 1 cup water

Directions

1. Preheat oven to 350 degrees. Line standard muffin tins with paper liners. Whisk together flour, baking soda, baking powder, and salt.

2. With an electric mixer on medium-high speed, cream butter and 1 cup sugar until pale and fluffy. Add eggs, one at a time, beating until each is incorporated, scraping down sides of bowl as needed. Beat in vanilla extract. Reduce speed to low. Add flour mixture in two batches, alternating with the sour cream, and beating until combined after each. Stir in 2 cups diced rhubarb.

3. Divide batter evenly among lined cups, filling each three- quarters full. Bake, rotating tins halfway through, until a cake tester inserted in centers comes out clean, about 25 minutes. Transfer tins to wire racks to cool completely before removing cupcakes. Cupcakes can be stored up to 3 days at room temperature in airtight containers; remove liners before topping if desired.

4. To make rhubarb topping, use the tip of a paring knife to scrape vanilla-bean seeds into a saucepan, reserving pod for another use (such as vanilla sugar). Add the water and remaining 1 cup sugar, and bring to a simmer, stirring to dissolve sugar. Remove from heat, and stir in remaining 1 cup rhubarb. Let cool completely. Remove rhubarb with a slotted spoon, and reserve. Return liquid to a simmer, and cook until reduced by half, 5 to 8 minutes. Let cool slightly, then return rhubarb to syrup. Once cool, rhubarb can be refrigerated in syrup up to 1 week in an airtight container; bring to room temperature before using.

5. To finish, dollop a generous amount of whipped cream onto each cupcake, and top with rhubarb and some syrup. Serve immediately.

Whipped Cream                                      

Ingredients

  • 2  cups heavy cream
  • ¼ cup confectioners’ sugar, sifted

Directions

1. Whisk heavy cream until soft peaks form.

2. Add confectioners’ sugar, and whish until combined
Posted under Cupcakes | 7 Comments
August 1st, 2011

Chocolate Mint Thumbprint Cookies [Club: BAKED]

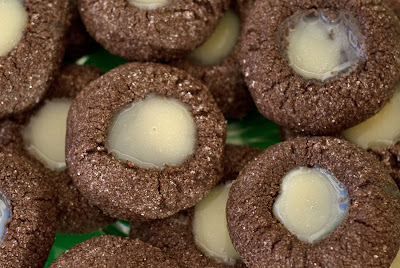
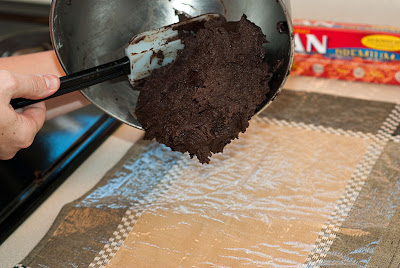
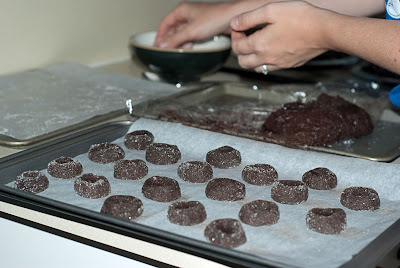
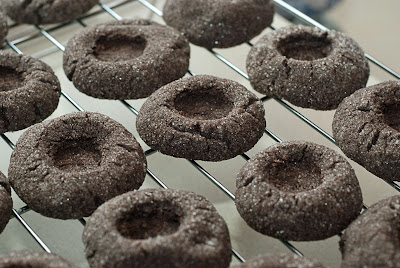
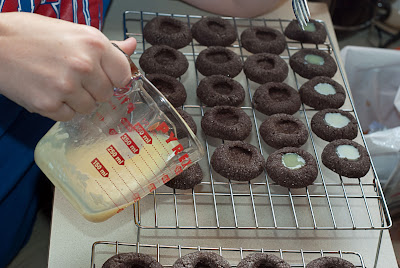
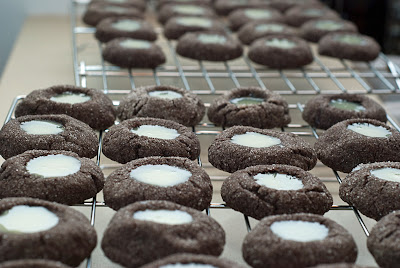
I was happy to have a party ChocolateMintThumbprintCookies07.jpg to go to right around the time that it was time to bake these Club: BAKED cookies. Josh and I wouldn’t want to have to eat them all… Although, after trying them I am sure that would not have been a problem! These were SO tasty… I didn’t have too many to bring home after the party :-(  Thanks to Jamie at Random Acts of Food for picking these cookies! They were delicious! How can you go wrong with chocolate and mint? My ChocolateMintThumbprintCookies01.jpg cookies did not come out as good as the ones in the book, but they tasted great, so I am not complaining! I pretty much followed the recipe as stated. I didn’t make any substitutions except for the coarse sugar… I didn’t have any of that and so I just used the regular stuff and it was okay. Take a look at the batter here…. the big difference between my cookies and the cookies in the book photo was that mine cracked quite a bit. I am wondering if I either mixed too much or not enough. It said the batter was supposed to be smooth. I am always afraid of over-mixing. I am wondering if this wasn’t ready yet. Anyway, I wrapped it and chilled it like it said. When it was readyChocolateMintThumbprintCookies02.jpg I took it out and  went to work. I wasn’t sure if they were going to expand or not. They didn’t expand much which is good because I began packing them in. Also, it said a cup of coarse sugar, but I did not use even close to a cup, but I think that is because I wasn’t using coarse sugar. When I took them out of the oven to work on the indentation I used the end of a wooden spoon as suggested. I thought this worked well. At this point they began cracking a little more, but not to the point where they were breaking so it wasn’t too bad. When they came out of the oven they smelled ChocolateMintThumbprintCookies03.jpg wonderful! I let them cool completely and then filled them. When I began filling I was a little worried that the filling wasn’t going to last until the last cookie, but thankfully it did. I thought maybe I was filling them too much or I did something wrong. I was able to fill all 41 cookies. I let them sit for a while before plopping them in the fridge. I actually almost forgot to put them in the fridge to chill likeChocolateMintThumbprintCookies05.jpg the recipe said. Once I did that they set up perfectly. These were such a hit. Everyone loved them at the party. I was able to take a just a few of them home and they tasted good for the two days – I needed to make sure I had a paper towel or napkin because they crumbled quite a bit. They continued to have such a great mint chocolate flavor the few crumbs that landed on the floor were well worth it! I will totally make these again! To see these cookies from other bakers check out all the links here.

ChocolateMintThumbprintCookies06.jpg

Posted under Cookies | 7 Comments
July 19th, 2011

Farm Stand Doughtnuts! [Club: BAKED]

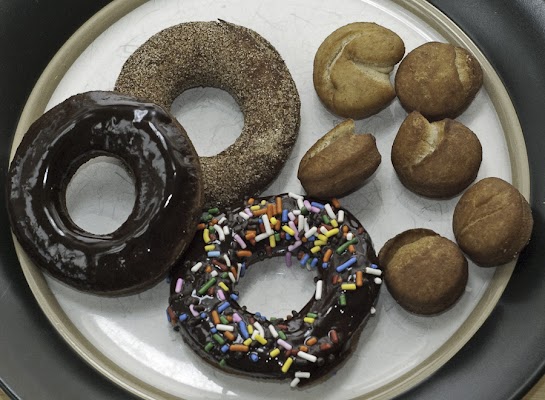
FarmStandDougnuts (1 of 1).jpg

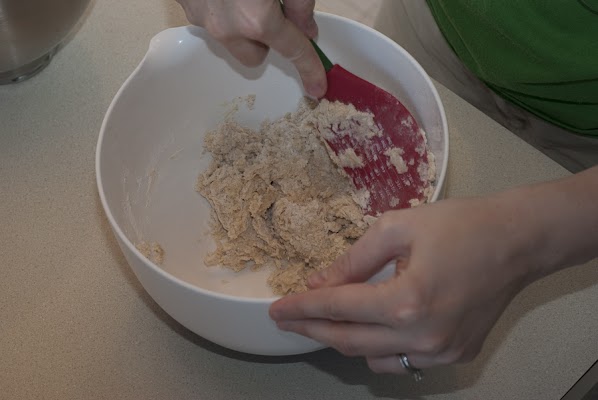
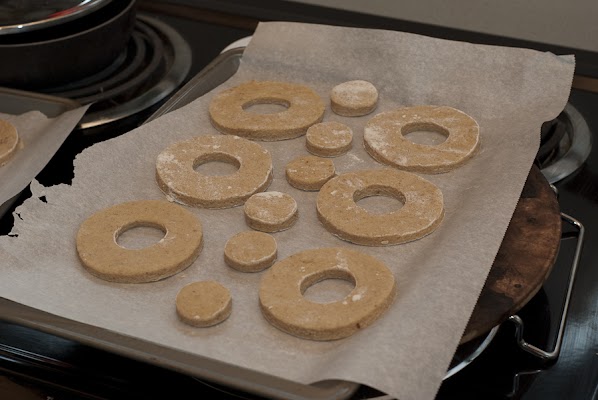
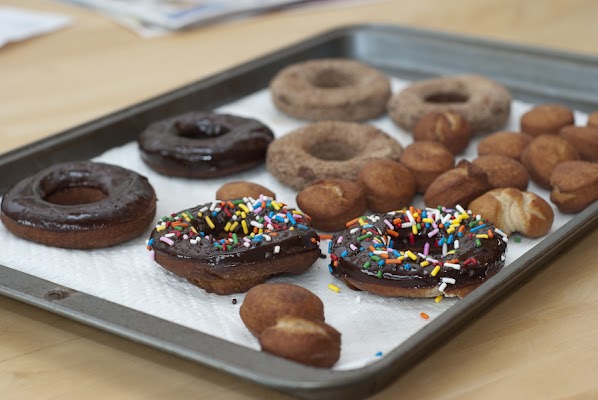
Merhaba, or hello from Turkey! When I saw that the second Club: BAKED selection was doughnuts I was so excited! Thanks to Gloria from The Ginger Snap Girl for choosing this for our second recipe!  This probably isn’t something I would have just thought to try on my own. I am now totally in love with making my own doughnuts. I thought it would be really complicated, but it was as easy as pie (or should I say doughnuts)! I was mostFarmStandDougnuts (2 of 9).jpg nervous about frying the doughnuts since I’ve never fried before, but it really was a cinch. I knew I had to make these early and so I made them on a day when we were planning to go to the Drive-in Movie Theater. What a great treat to bring – homemade doughnuts!  It all began with mixing all the dry ingredients and then adding the liquid ingredients in a little well in the center of the dry ingredients to create the dough. After quite a bit of folding I ended up with a ball of dough.  I rolled this out (maybe a little too thin as you will see later) and then used my cookie cutters to cut out the doughnuts (using a large  3 1/4 in. cutter for the outer part and a smaller 1 1/2 in. cutter to cut out the middle). Here is one tray of them all cut out and ready to go in the fridge for a while. I liked that all of the dough

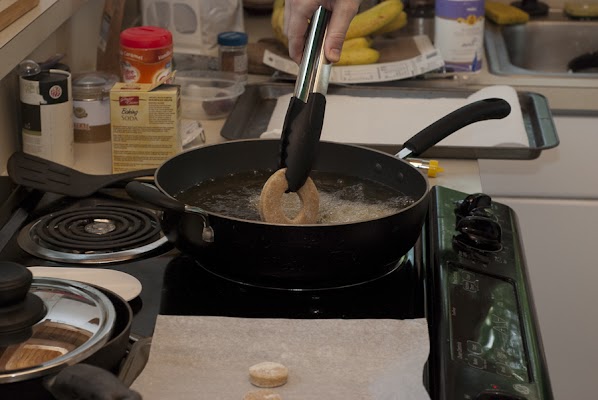
FarmStandDougnuts (4 of 9).jpgwas used since you could use the cut out centers to make doughnut holes. At this point I started to heat the oil. It wasn’t as bad as I thought it was going to be, although it did take a lot of oil! I bought a new thermometer just for this because I wanted to make sure I had the temperature right and I wasn’t sure that the one I had was working. While the oil was heating I made the toppings. I made two of the toppings because I really wanted both the chocolate and the cinnamon sugar. Now it was time for frying! I just plopped them into the oil.

FarmStandDougnuts (5 of 9).jpg

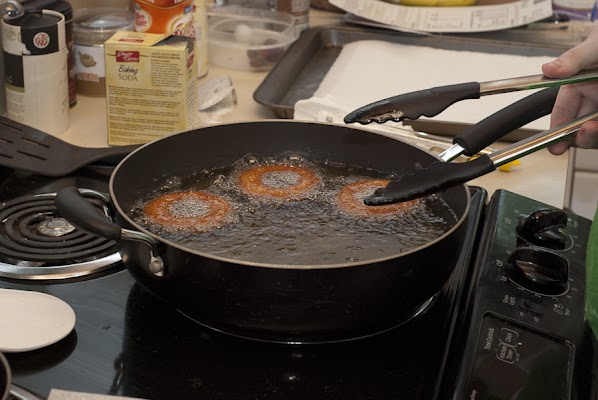
FarmStandDougnuts (6 of 9).jpgI was able to fit about three doughnuts at a time in my pan. As you can see in this second shot to the right they got pretty brown. I was worried they were going to be burnt. I followed the directions and fried them for 2-3 minutes on the first side and  probably shouldn’t have done them that long. I think they browned up faster because they were probably skinnier than 1/2 in… You think for a math person I would get my  measurements  right!  :-)  Anyway, even though they browned up pretty fast they didn’t burn and they all tasted fine. In the next few batches I fried them for a little less. Once they were done frying I dipped them in the chocolate and cinnamon sugar. I garnished a few of the chocolate ones with sprinkles and they were ready to eat.  We each ate one and then packaged up theFarmStandDougnuts (8 of 9).jpg

rest. Take that Dunkin’ Donuts and Krispy Kreme – there is a new dougnut shop in town! We brought these with us to the movie and were able to enjoy fresh homemade doughnuts from our car while we watched X-Men: First Class. We waited until the movie started and so I didn’t get a picture of us eating the doughnuts, but here is me in the car before the movie started. We watched a good movie and had some good eats! To all my Club: BAKED friends – I’ll be sure to check out your doughnuts when I return!FarmStandDougnuts (9 of 9).jpg

Posted under Other Sweets | 1 Comment
July 1st, 2011

NY-Style Crumb Cake [Club:BAKED]

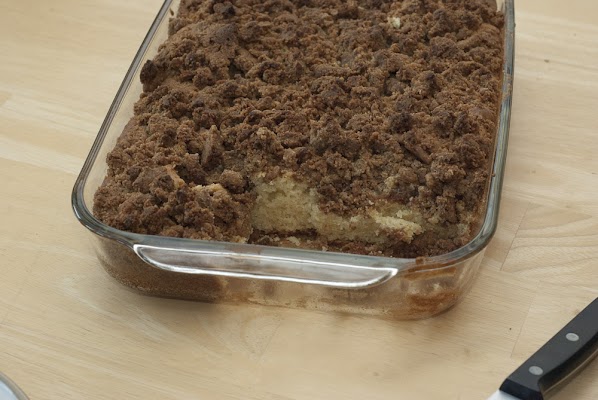
I must admit that I made this NY-Style Crumb Cake a few weeks ago…. I just haven’t had any time lately to bake. We are leaving for Turkey next week and I still have a ton to do, but it was time to get this posted, so here it is! This is my first Club: BAKED post. Not sure if you read my post about joining Club: BAKED, but here it is. Karen from Karen’s Cookies, Cakes, & More who started the group choose NY-Style Crumb Cake for our first recipe. You can see her post here – I loved her idea of making these into jumbo cupcakes!  As a native New Yorker myself it was perfect! Not sure what the Baked Explorations authors would think about this comment I am about to make, but I will makeNYCrumbCake (11 of 11).jpg

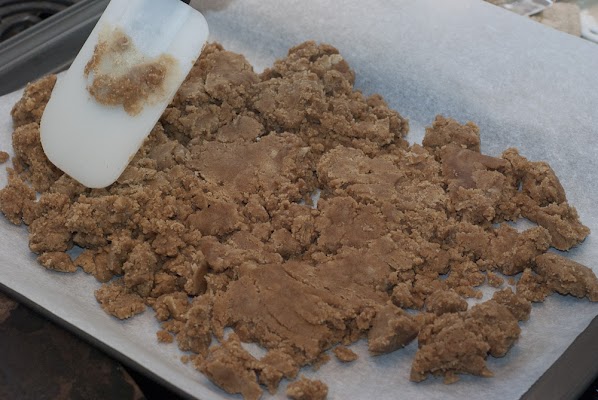
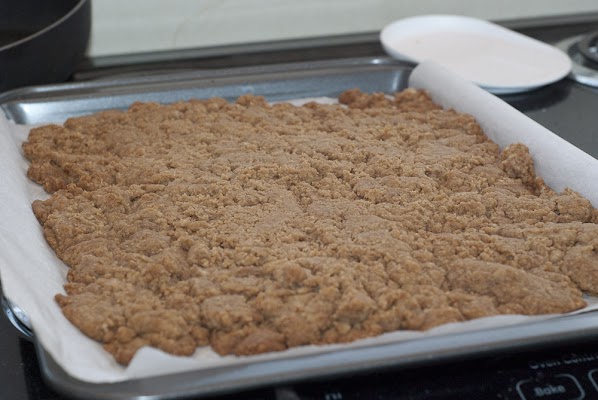
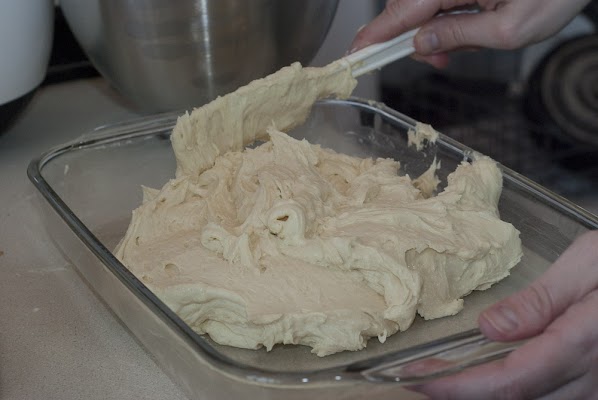
it anyway… it made me think about the Entenmann’s NY Style Crumb Cake. We used to eat that all the time. I made this the day before Josh had a meeting at school and so he was able to bring this with him. That was nice because it was too much for us to eat! Now this is not called a crumb cake for nothing – the pictures don’t really do it justice – the ratio of crumb to cake was over 50% for sure! Here is what the batter cake batter looked like before there was any crumb. I followed the recipe and used a 9 x 13 in pan.NYCrumbCake (5 of 11).jpg Other bakers were really creative and used muffin or jumbo cupcake pans – what a great idea! I decided to follow the little Baked Note about Renato liking huge crumb chunks and so I placed the crumb topping in the oven to dry out (maybe a little too much despite their warning). Here’s the before and after:

Before

NYCrumbCake (2 of 11).jpg

After

NYCrumbCake (6 of 11).jpg

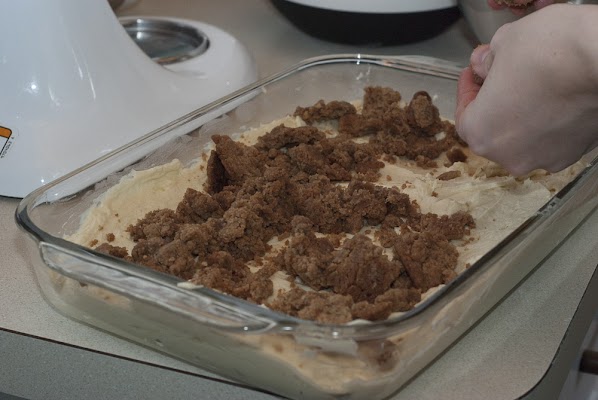
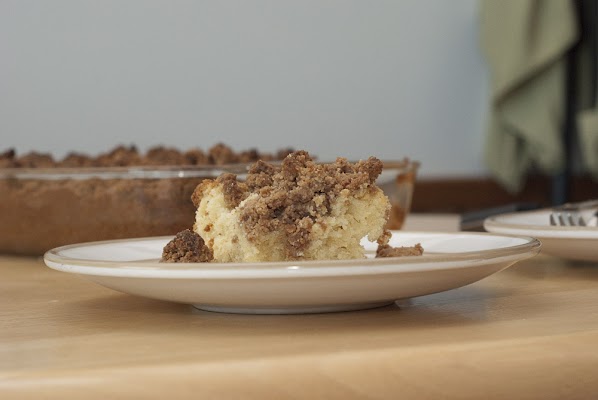
It doesn’t look too dry, but I guess since it got cooked again once I put it on top it got pretty crunchy. Next time I probably won’t do this part. Josh had some left overs from his meeting and I actually think it softened up a bit and tasted better 2 days after I made it! Anyway, here I am putting the crumb topping on. There was so much crumb topping!NYCrumbCake (7 of 11).jpg And finally… here is the final baked crumb cake (minus a piece or two). I am definitely going to enjoy baking along with everyone through this book. Check out Club: BAKED to see all the other crumb cakes. Stay tuned for the next installment … Up next is Farm Stand Buttermilk Doughnuts. Since I’ll be in Turkey I made those early too, but I’ll still be posting those on July 15.

NYCrumbCake (10 of 11).jpg

Posted under Cakes | 12 Comments
June 19th, 2011

Remix

Sometimes a good remix is better than the original.  I’m not sure if that was the case for these, but people seemed to like them just as much as the original… so that’s a good thing! I made both of these remixes back in May. The first one was for our end of the year Secondary Math Intern Poster session. I had subbed once for the class and decided to bring the  Maple Buttermilk Pancake cupcakes as a treat. MapleButtermilkBananaFilling.jpgOne intern told me that they would be great with banana. So, when I was asked to make a mini version of these I thought why not try a little banana filling. Since I wasn’t completely sure how these would come out I made half banana filling and half plain. I then garnished the banana ones with a little banana chip. People seemed to like them. I actually think I like them better without the banana, but the banana is a nice change from the usual. The second remix was for my friend who just finished up his PhD and was going back to Singapore. I did my usual MSU PhD cupcakes (I think I have done some various of this one about 5 times already!) Since we were having the party at my house I could have them set up on a table and so I decided to do both green and white ones and write a little congratulatory  message for him. Here’s a close-up. The party started before Josh got home, so I took this with my little camera so the quality isn’t as great! I think these will forever be the signature PhDcupcaker cupcakes…MSU_DrLee04.JPG

Also, in case you didn’t notice… I now have a little Twitter icon way on the right. Josh and I joined Twitter for a contest to win a really nice camera… Not sure I will tweet much, but thought I could tweet my posts there as well…. Also, I only have 7 followers on the blog (look to the right under Fellow Cupcakers and Enthusiasts) right now and one of them is me… how sad… I think more people are reading my blog though… so, if you haven’t already, why not become a follower :-) Who knows… there may be a cupcake in it for you at some point… Thanks to those that are already following!
 

Posted under Cupcakes | No Comments
June 12th, 2011

Homemade Peanut Butter Cups

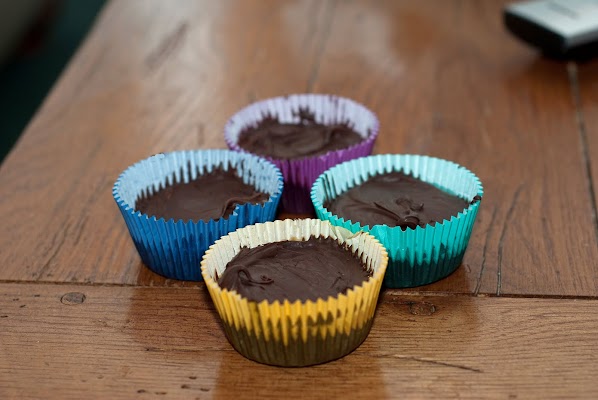
HomemadePBCup01.jpg

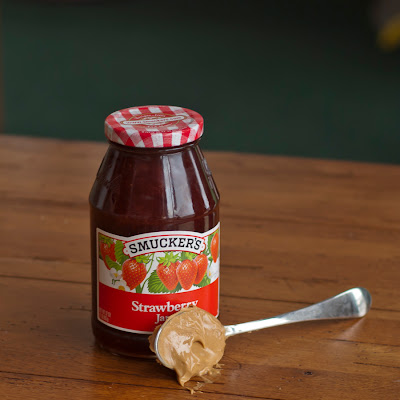
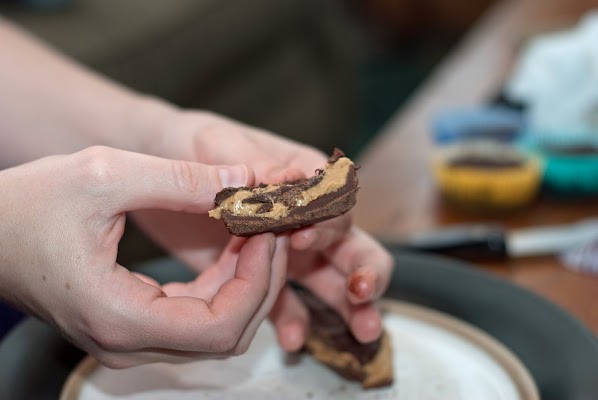
One night I was looking for something sweet to eat… I knew I had some peanut butter and I had some chocolate left over from my Hostess with the Mostest Cupcakes so I thought I would try to make some putter butter cups. I had been given a recipe for these from a vegan cookbook, but I didn’t have all those ingredients so I just made do with what I had – peanut butter, chocolate, powdered sugar, and vanilla. I melted the chocolate and lined some regular sized cupcake liners with the chocolate.  I put them in the fridge for a while to harden up a bit and I made the filling by mixing 1 cup of peanut butter, a 1/2 cup powdered sugar, and 1 tsp. vanilla extract. I also put this in the fridge for a bit. When the chocolate liners were ready I took them out and added a dollop of the peanut butter mixture into each liner and then finished them up with a dollop more of chocolate to cover… Like I said, I was doing this on a whim and so I ended up not having enough chocolate to cover them all. Two of them just ended up having just a bottom layer of chocolate, but they still tasted great.  After a little more time in the fridge they were ready to go. Here’s a snapshot of one that I cut in half.
HomemadePBCup02.jpg

I must say that they were not easy to eat – biting through the chocolate layer to get to the peanut butter was a bit of a chore, but they tasted so good!  I would definitely try these again. They would also be great in mini-liners – you could just pop a whole one in your mouth -more like the Reese’s Miniature Peanut Butter Cups!


Posted under Other Sweets | No Comments
LorrainePhD Welcome to
PhDcupcaker,
my site devoted
to all things
cupcake (and
other sweets)!
 
When I started this blog I was
on my way to earning my PhD
in mathematics education. Since
then, I have earned my PhD and
moved from one B1G Ten school
Michigan State, to another, The University of Nebraska in Lincoln.
Hopefully as an assistant
professor I'll still have some
time for cupcakes.
 
If you are looking for my professional site you can find it at: http://lorrainemales.com

Subscribe to Posts via RSS

RSS Feed

Subscribe via e-mail

Enter your email address:

Delivered by FeedBurner

Archives

QR Code Business Card